Okta (OpenID Connect) SSO setup
LoanPASS supports using Okta and other OpenID Connect providers to allow for single sign-on (SSO) for your organization. You can either allow for users to continue to sign in via email / password alongside SSO, or you can enforce that all users must sign in via SSO.
Note: To sign in via Okta, a user account must first be added in LoanPASS by a LoanPASS admin. The email address must match between the user's Okta account and their LoanPASS account.
Configuring SSO via Okta
To allow users to sign in via Okta, you will need to create an Okta app for LoanPASS, and additionally configure your LoanPASS client to use Okta for SSO.
Create an Okta app
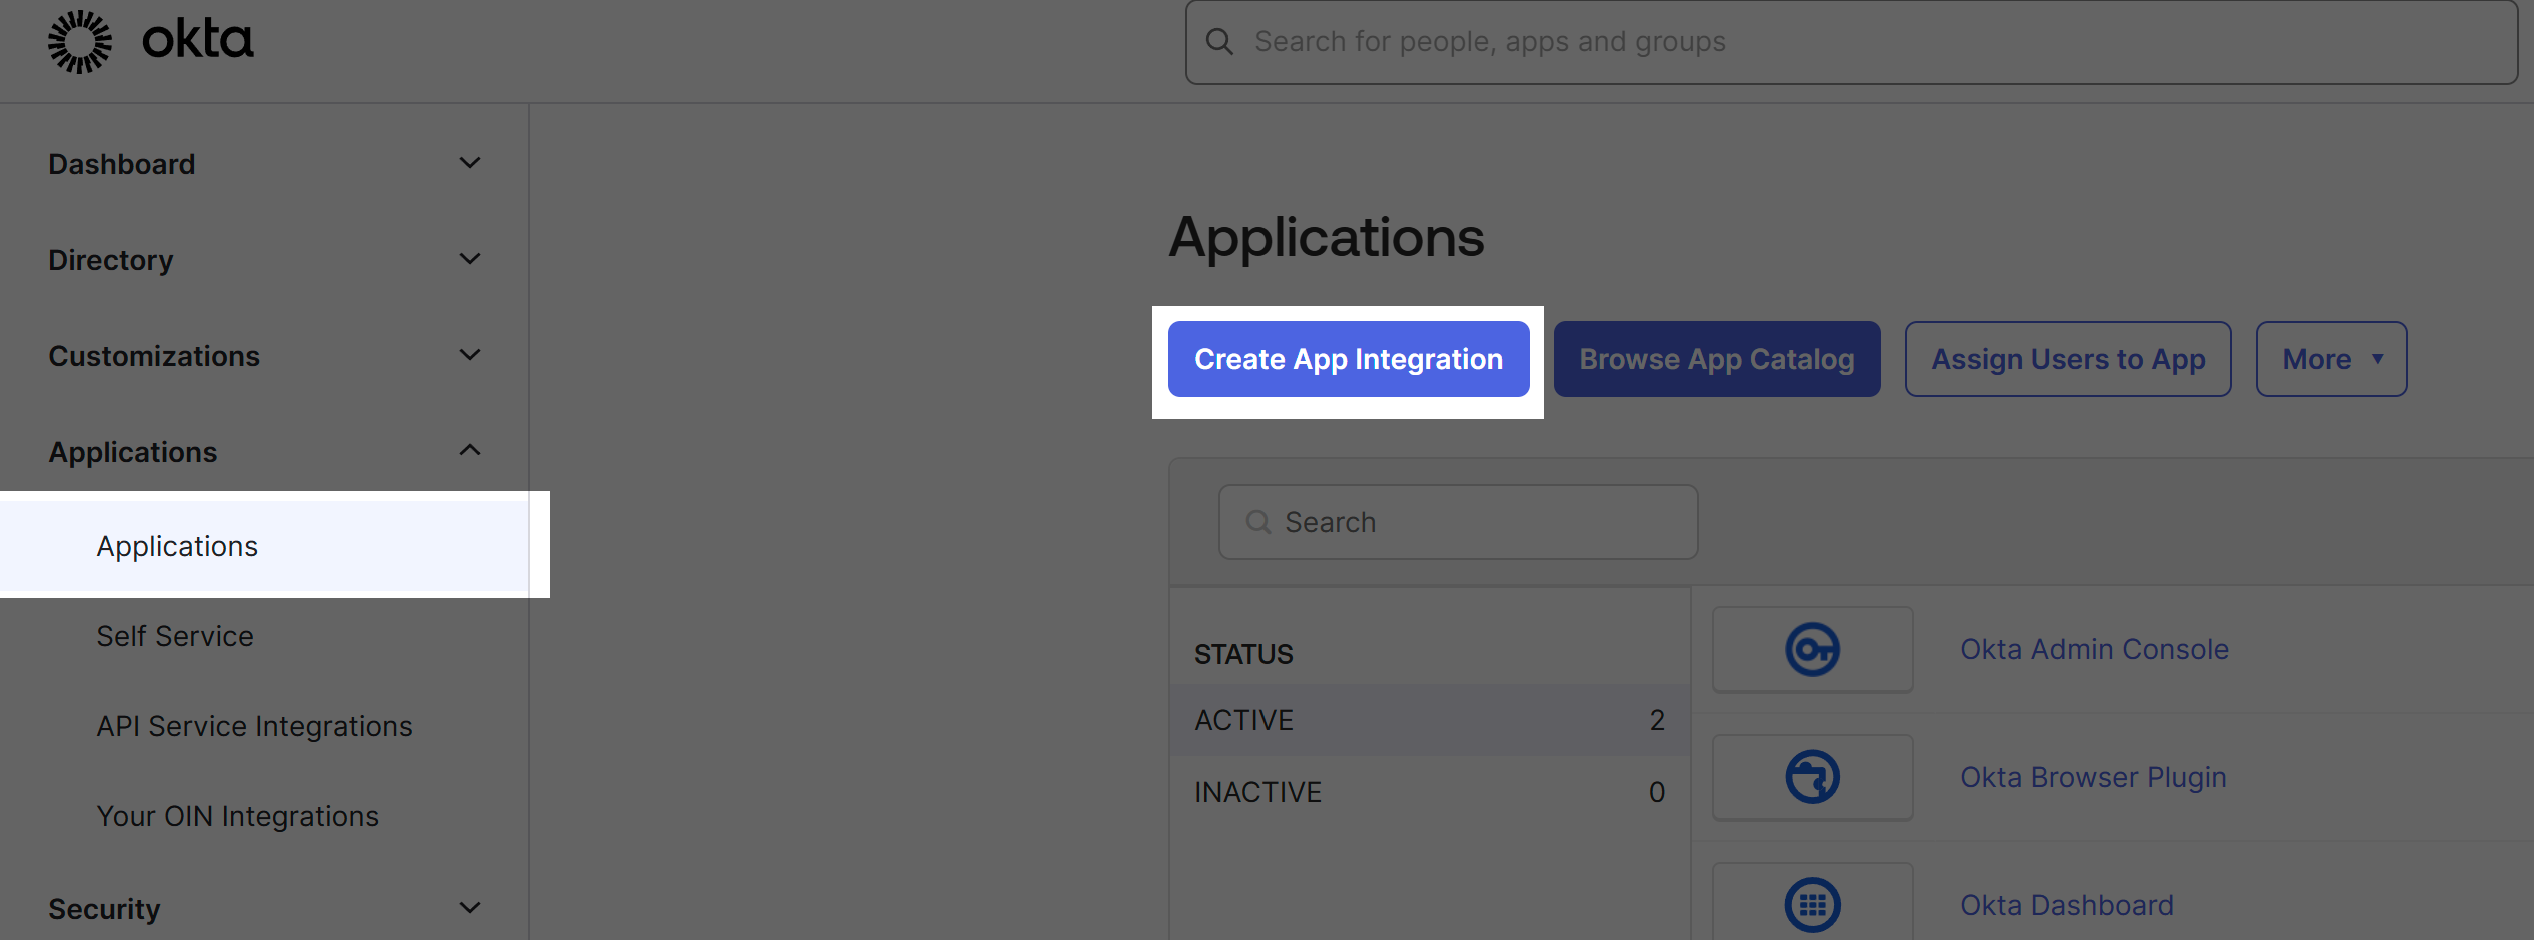
Navigate to the Okta Admin Console. From the Okta user dashboard, Okta administrators should have an "Admin" button on the top right of the page.
Under the sidebar, navigate to "Applications > Applications", then click "Create App Integration"
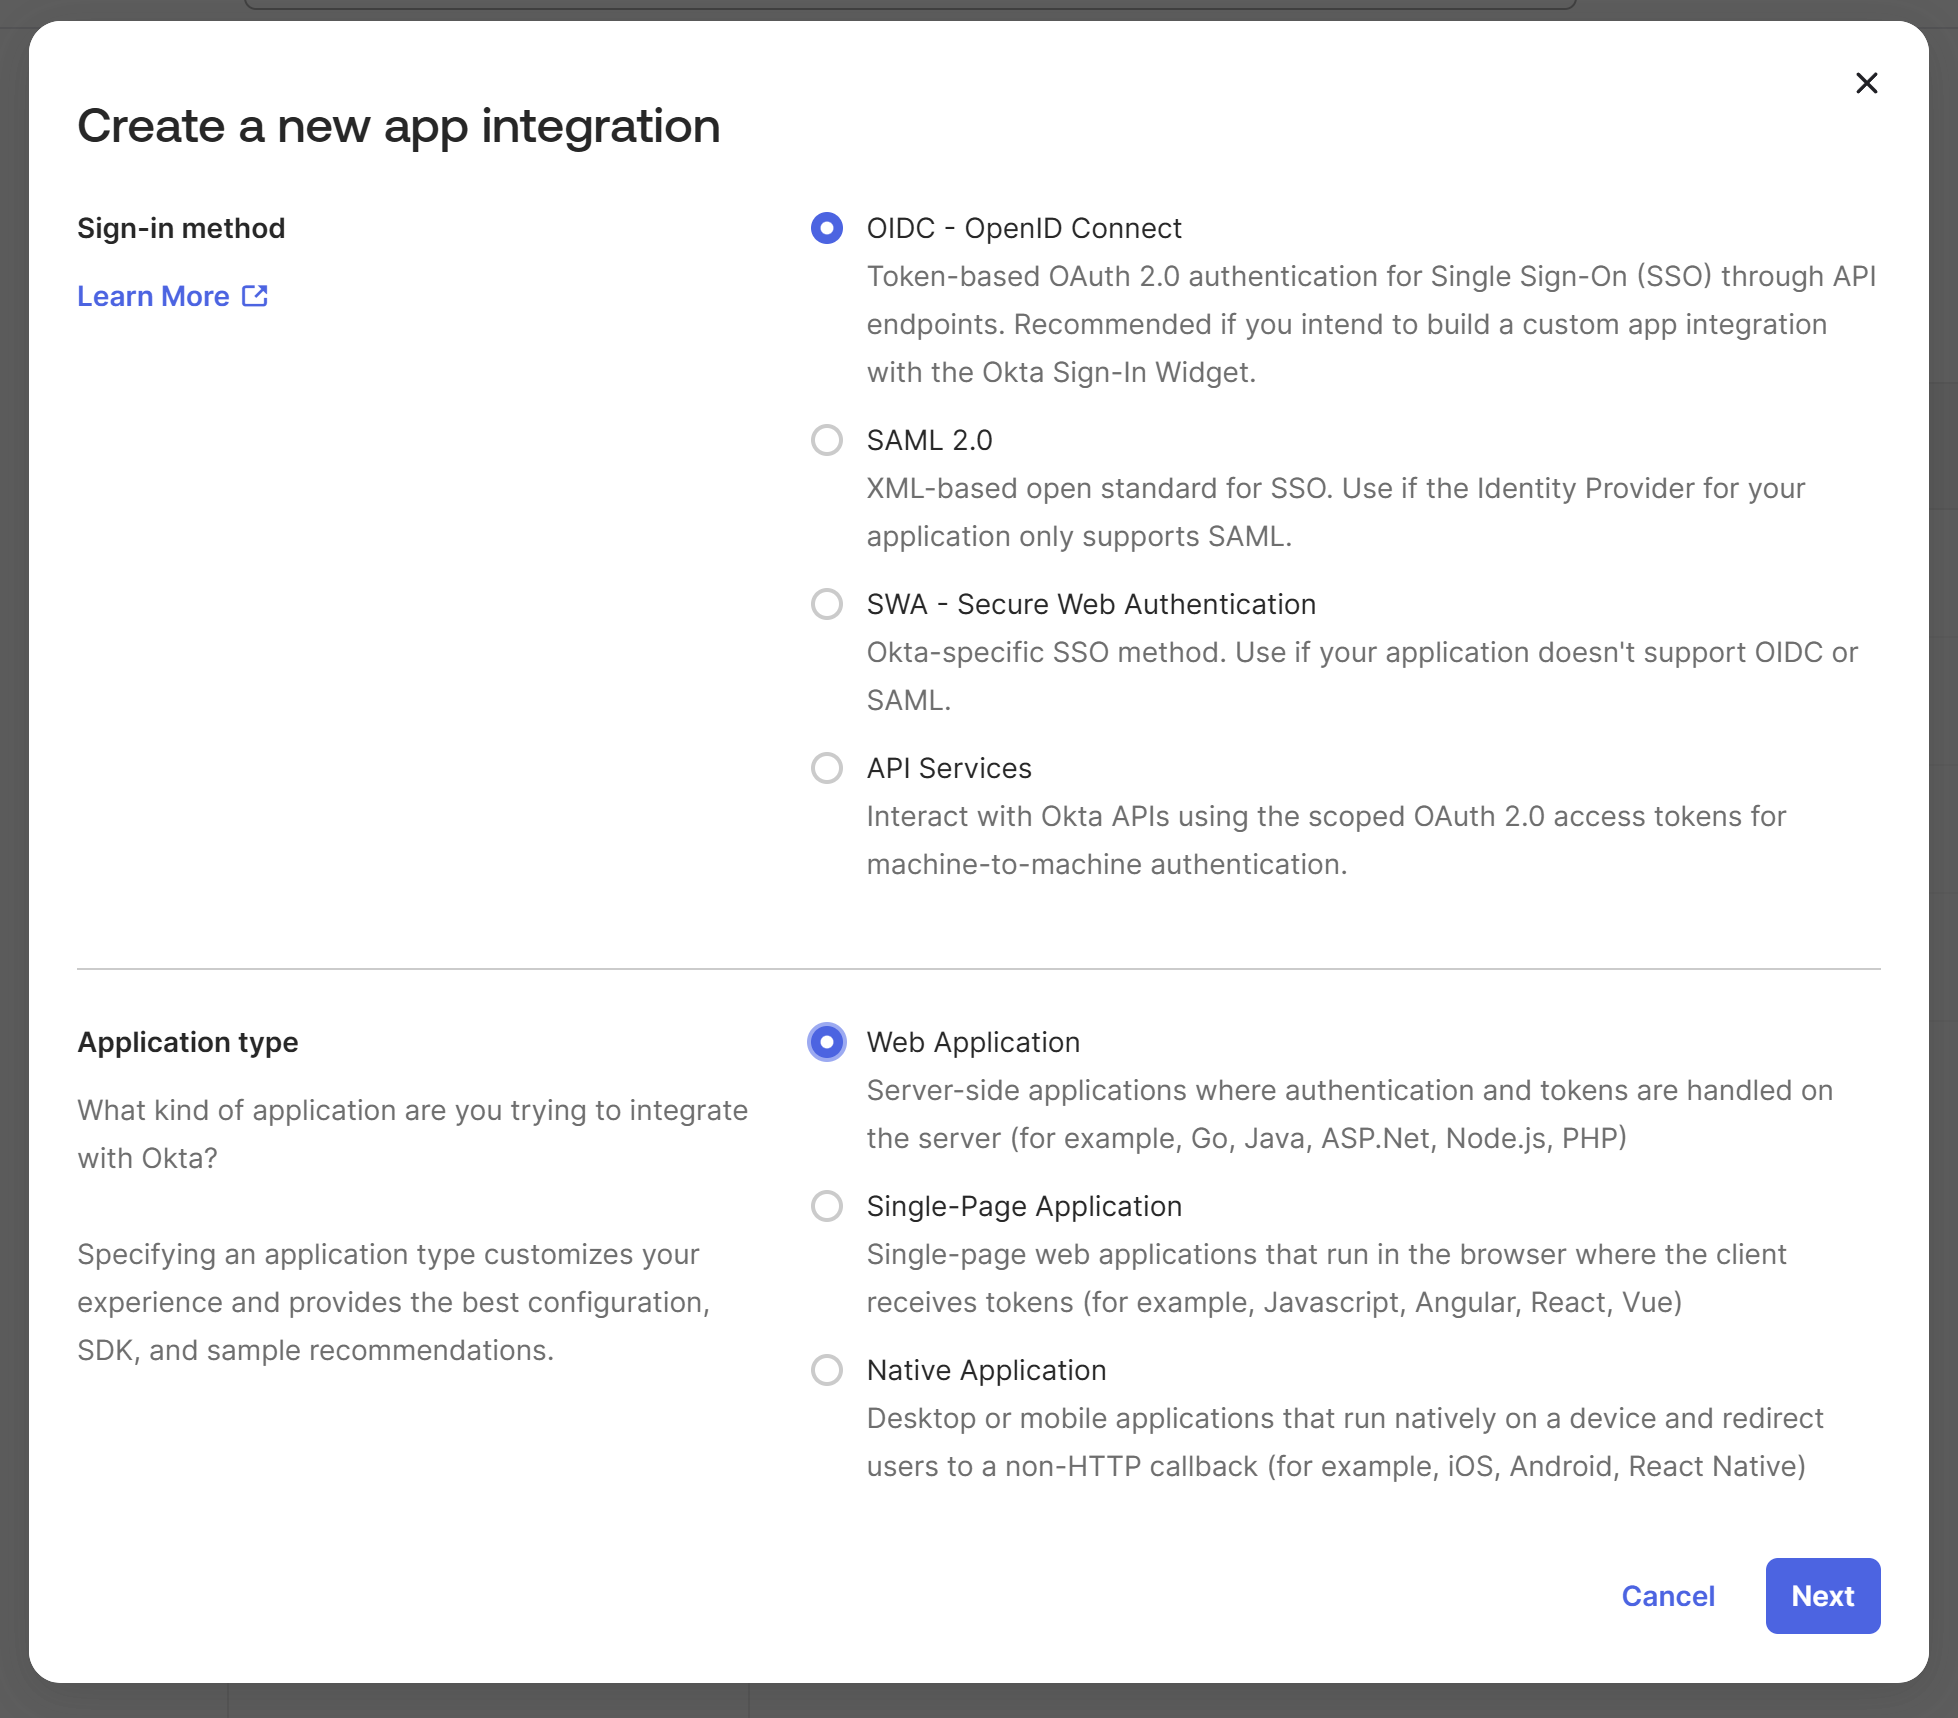
For the sign-in method, choose "OIDC - OpenID Connect". Then, for application type, choose "Web Application". Then click "Next".
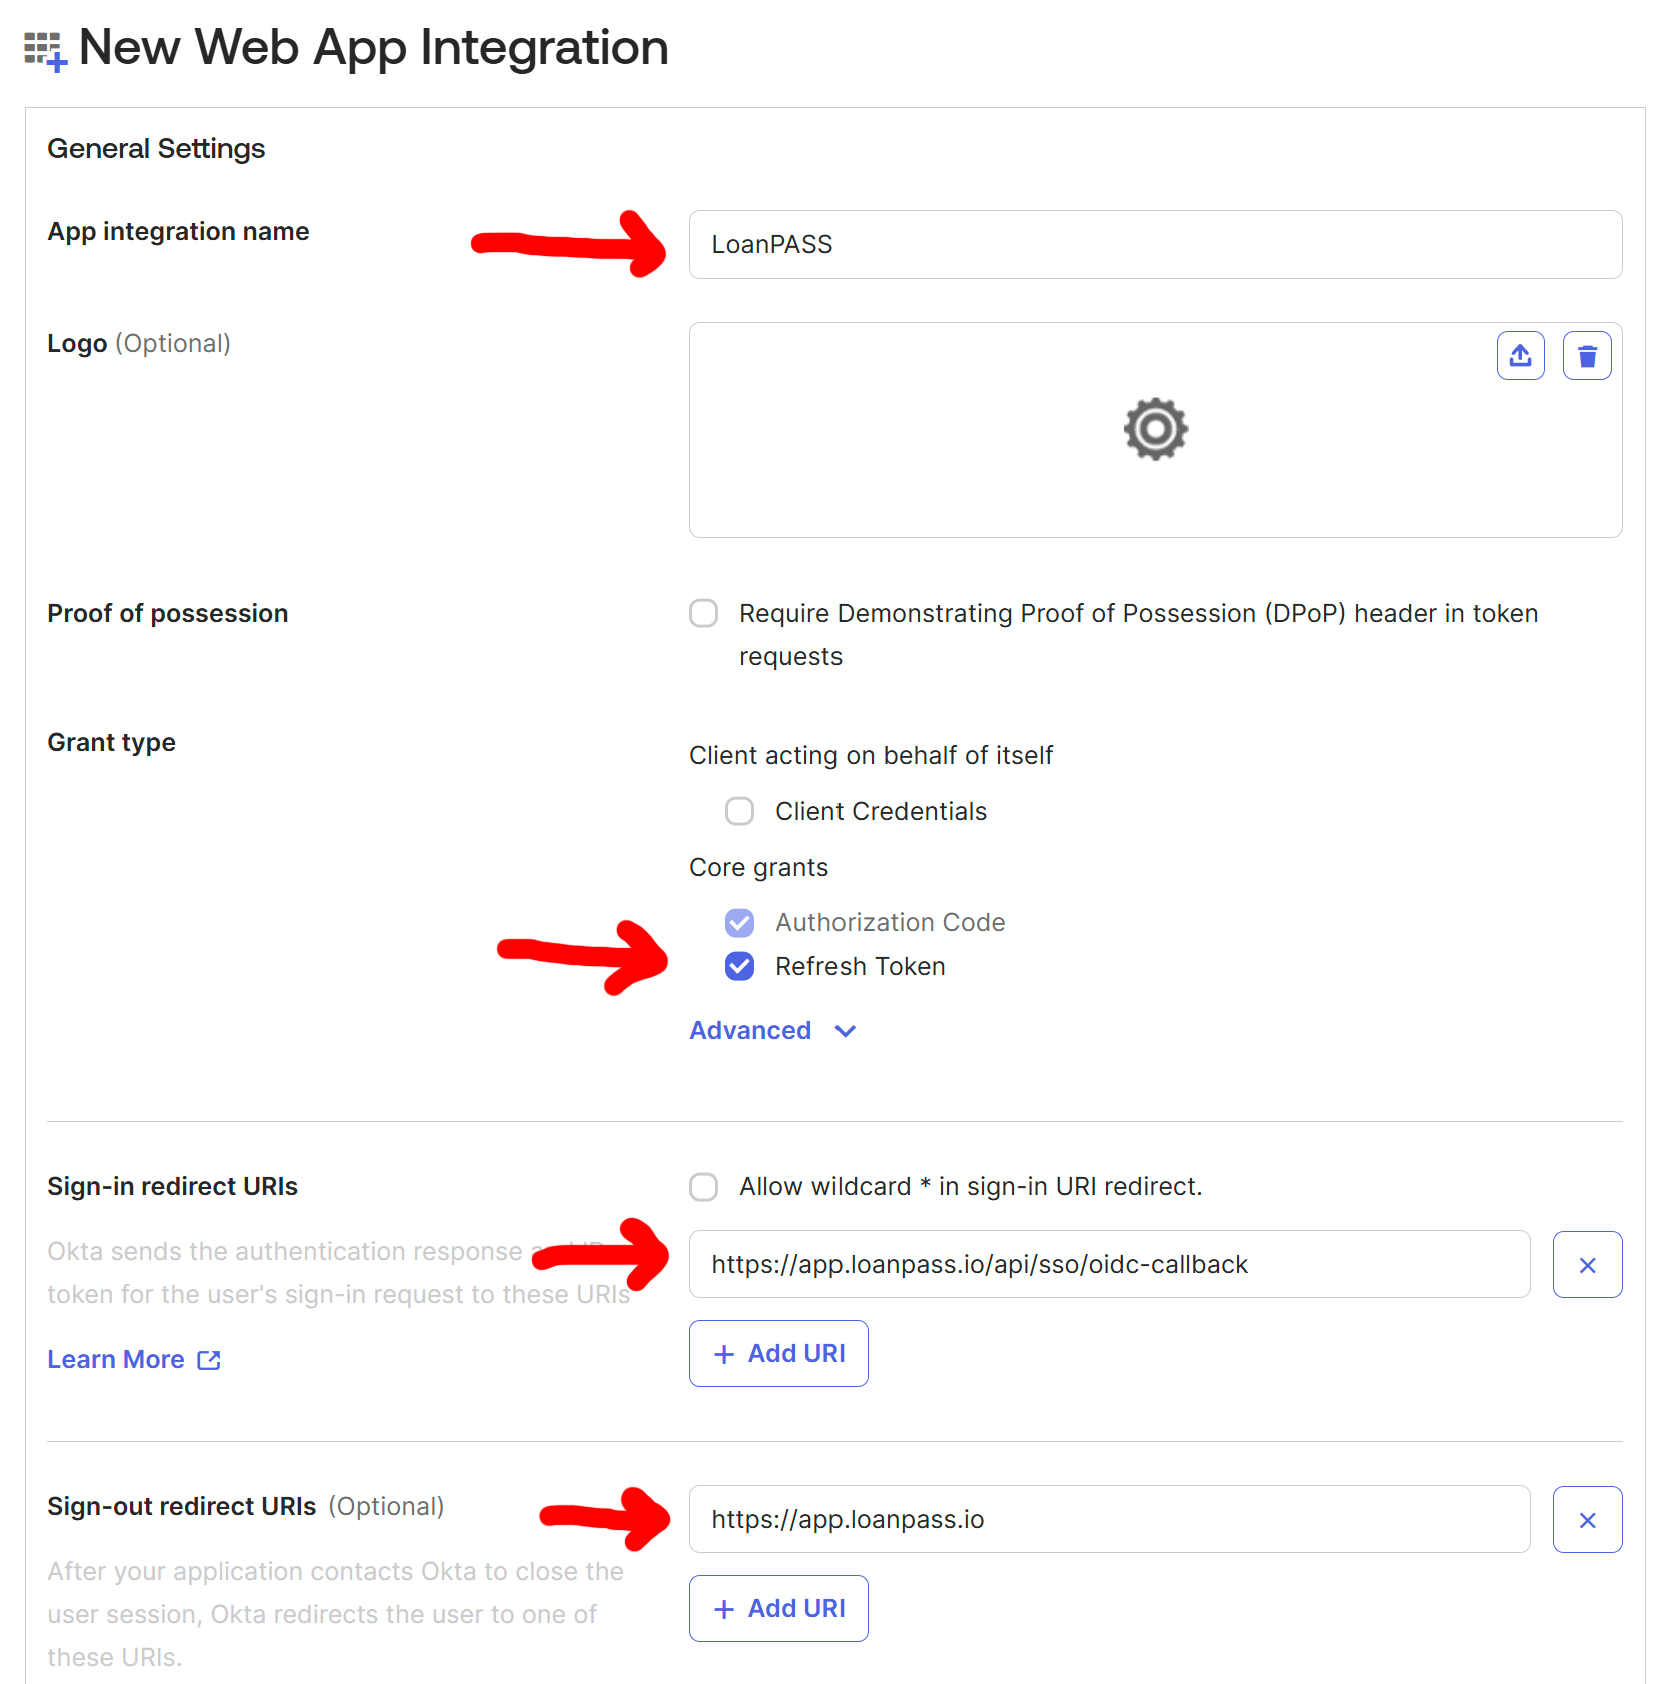
On the "New Web App Integration" screen, make the following changes:
- General Settings
- App integration name: LoanPASS
- Grant type: Enable Refresh Token
- Sign-in redirect URIs
- Replace the default with the following URL:
https://app.loanpass.io/api/sso/oidc-callback
- Replace the default with the following URL:
- Sign-out redirect URIs
- Replace the default with the following URL:
https://app.loanpass.io
- Replace the default with the following URL:
- Assignments
- Choose which users should be able to sign in to LoanPASS via Okta. For example, choose "Allow everyone in your organization to access" if all users should be able to sign in to LoanPASS through Okta.
Click "Save" to create the app integration. You should be taken to the configuration for the new app.
Configure the Okta app
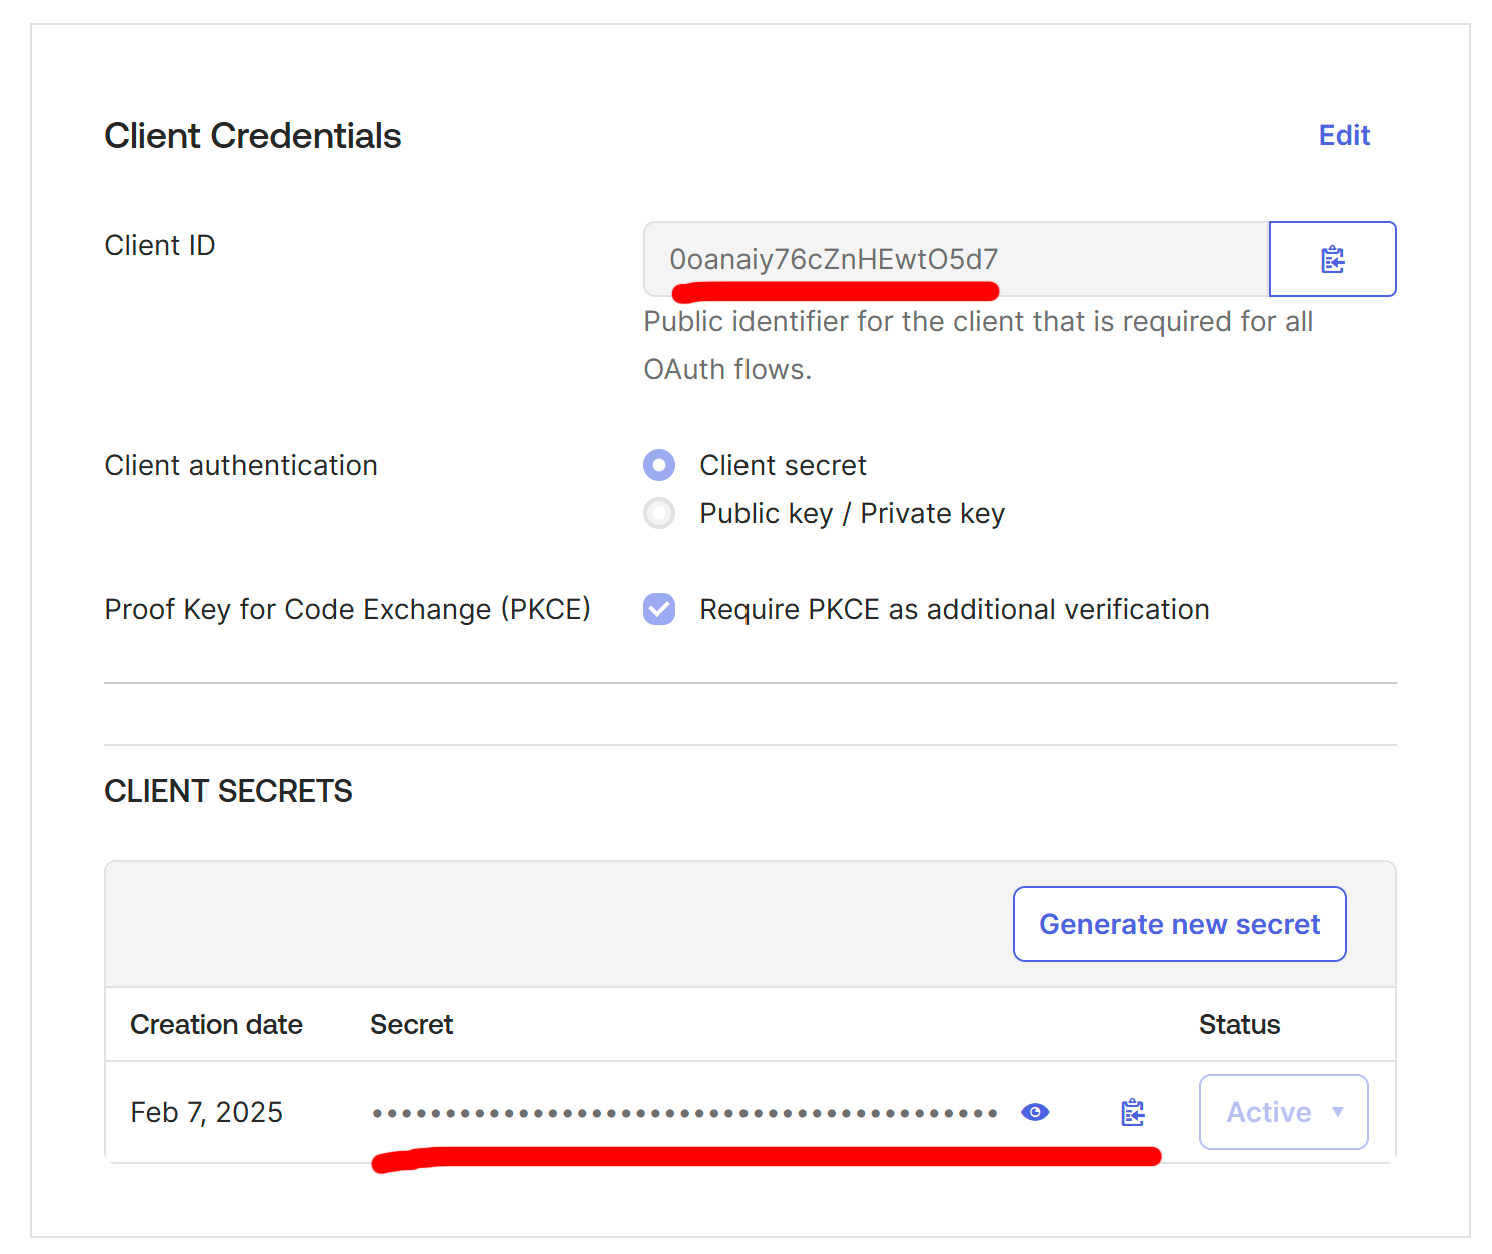
On the configuration screen for the new application, click "Edit" within the "Client Credentials" section. Enable the option "Require PKCE as additional verification", then click "Save"
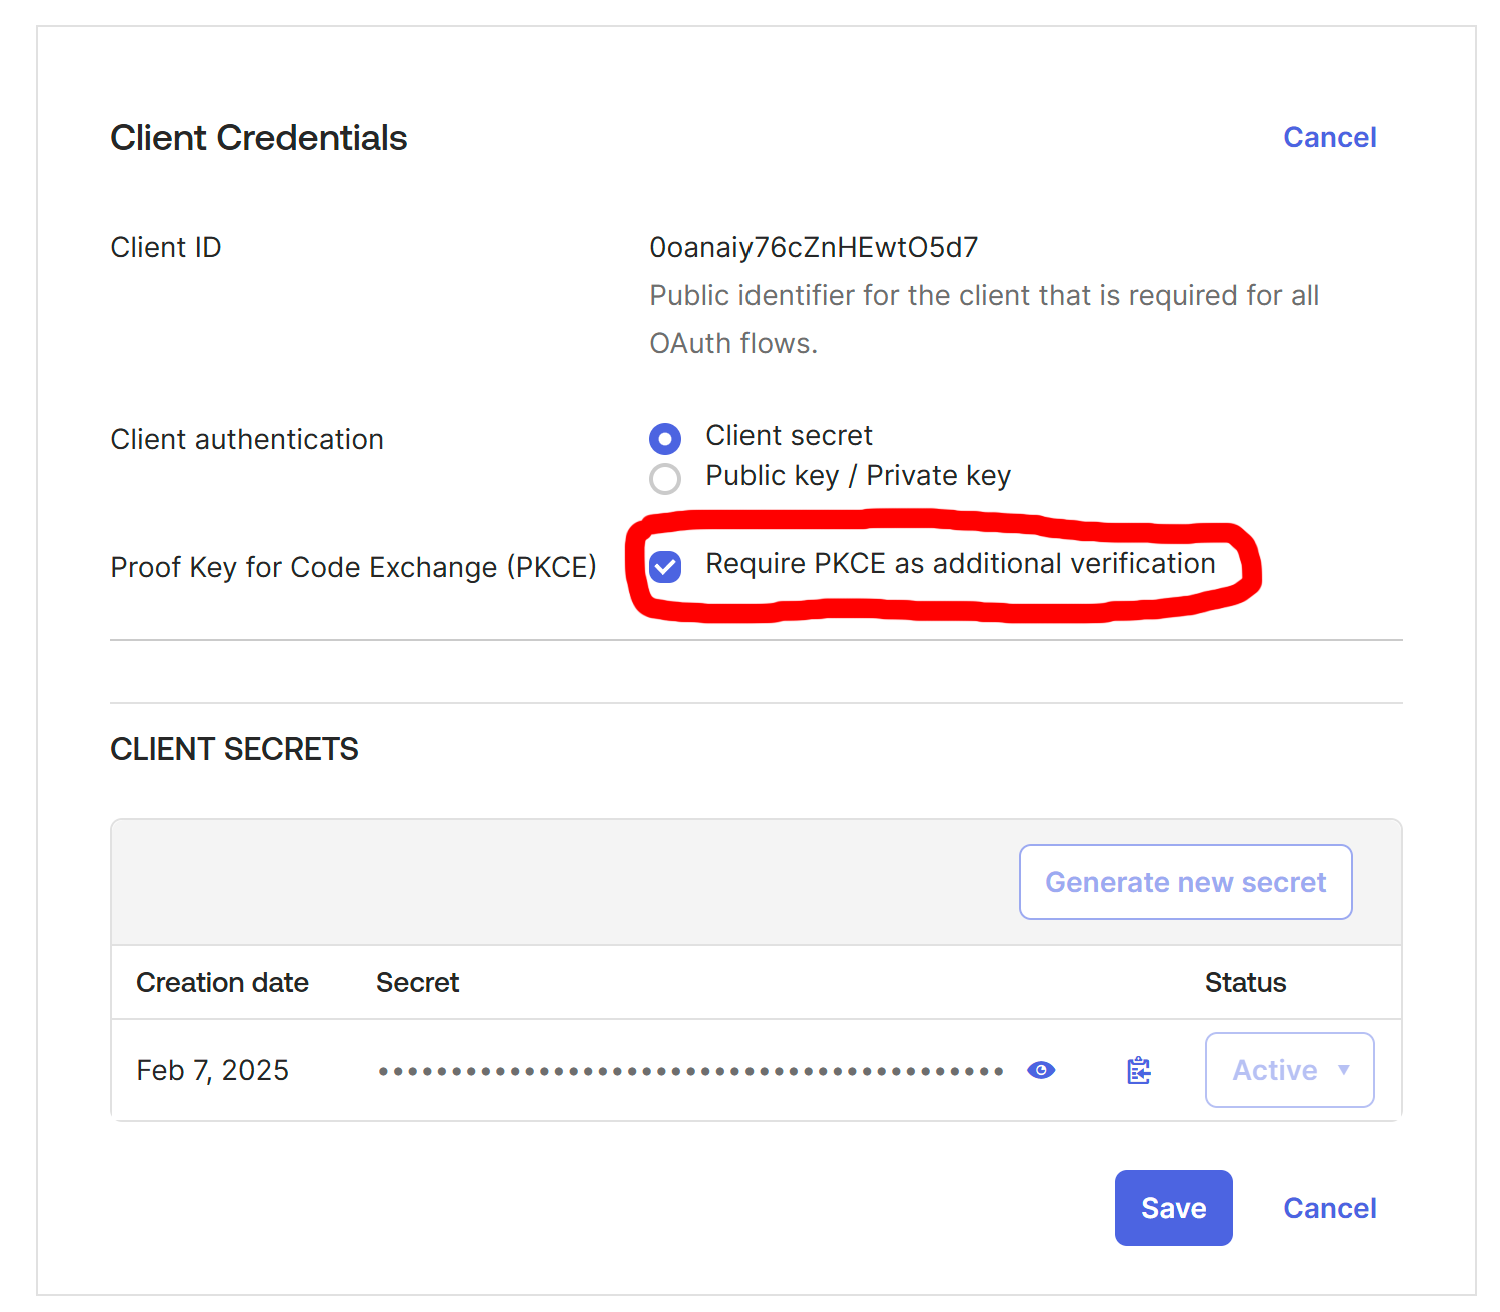
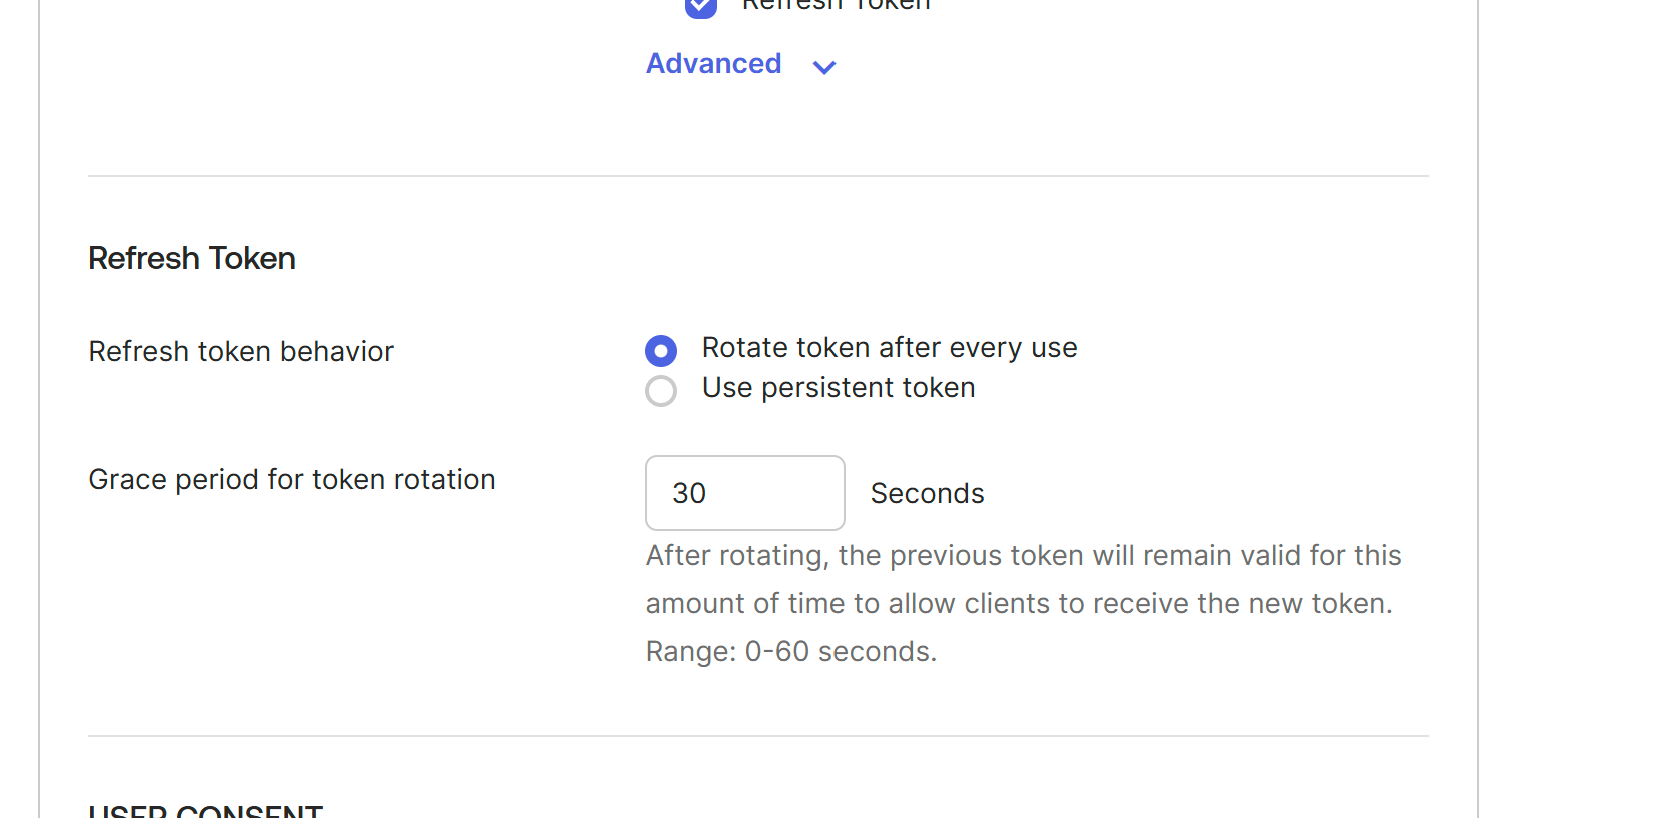
On the same screen, click "Edit" under "General Settings". For "Refresh Token > Refresh token behavior", choose "Rotate token after every use", then click "Save".
Configure OpenID Connect in LoanPASS
Grab the client ID and copy the client secret, and submit a support request with the following details:
- Your Okta domain name:
https://myorg.okta.com - The app's Client ID
- The app's Client secret
Configuring SSO via another OpenID Connect provider
LoanPASS SSO supports providers that follow the OpenID Connect protocol. To configure LoanPASS for SSO, you will need to configure an integration and grab the following details:
- Issuer URL
- Client ID
- Client secret