LoanPASS <iframe> API
The LoanPASS <iframe> API is an API that makes it easy for other services to integrate with the LoanPASS pricing engine and its existing user interface. Integrations are able to show their end-users the same UI they'd get through the main LoanPASS application, but with a few integration points that integrators can tweak and customize to suit their needs.
<iframe> API Demo
A demo application for the LoanPASS <iframe> API is available at https://iframe-demo.loanpass.io/. This is a simple example application that allows for experimentation with the <iframe> API, and doubles as an internal tool for testing out the <iframe> API.
Given a LoanPASS environment URL and a client's access ID, clicking the "Connect" button will embed an <iframe> and enable <iframe> API calls.
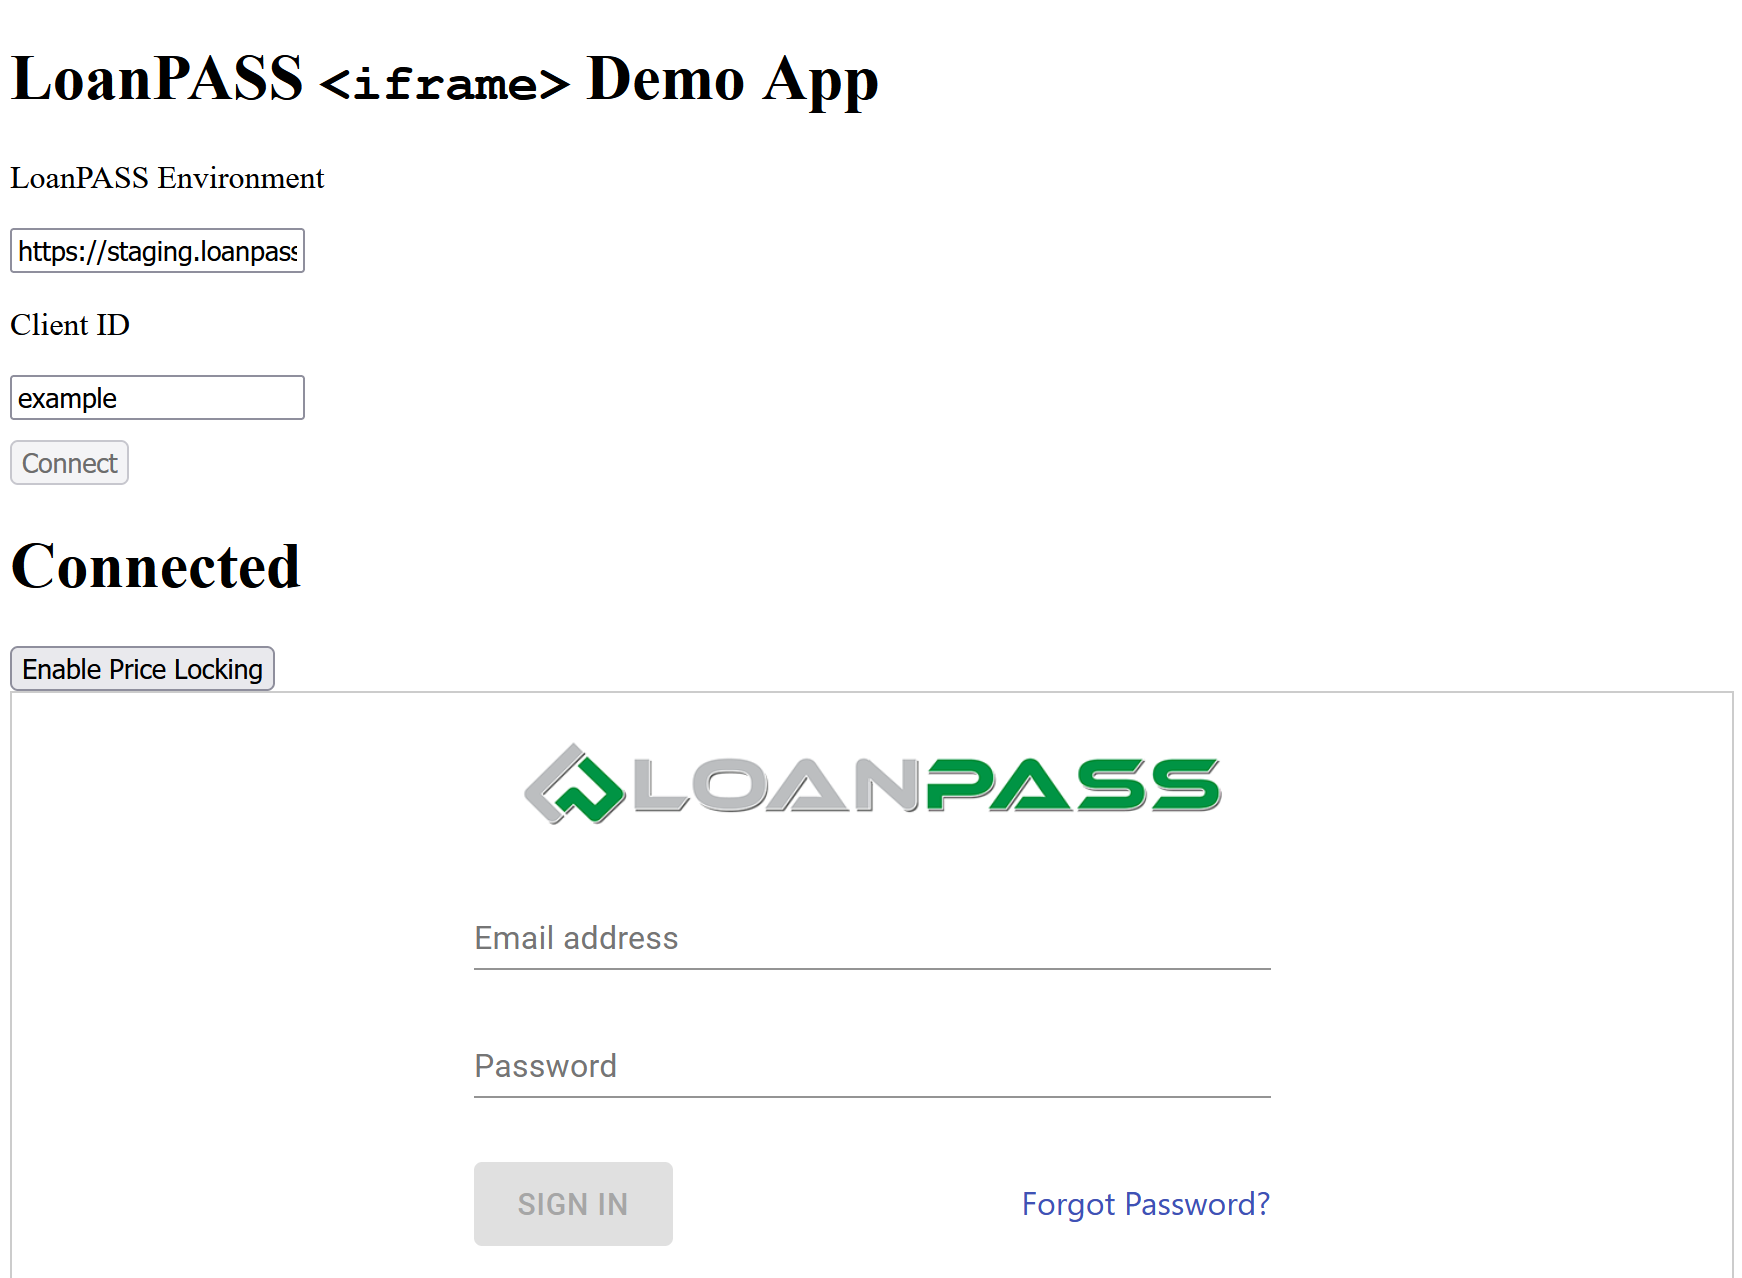
Setup
The "LoanPASS Environment" field should be set to the URL for a LoanPASS environment that has been configured to enable the <iframe> API. For example:
- Staging:
https://staging.loanpass.io - Sandbox:
https://integrationsandbox.loanpass.io - Production:
https://app.loanpass.io
The "Client ID" field should be set to a client's access ID, which can most easily be found in a client's login URL. For example, if the LoanPASS login page is https://app.loanpass.io/login/example-client, then the client access ID would be example-client.
Usage
After clicking "Connect", the <iframe> will be loaded showing the client's login page. After clicking "Enable Price Locking", an extra "Lock Request" button will be shown at the end of the pricing calculation modal (under the "Price a Loan" page, after getting a price for a product and clicking on a valid price in the table).
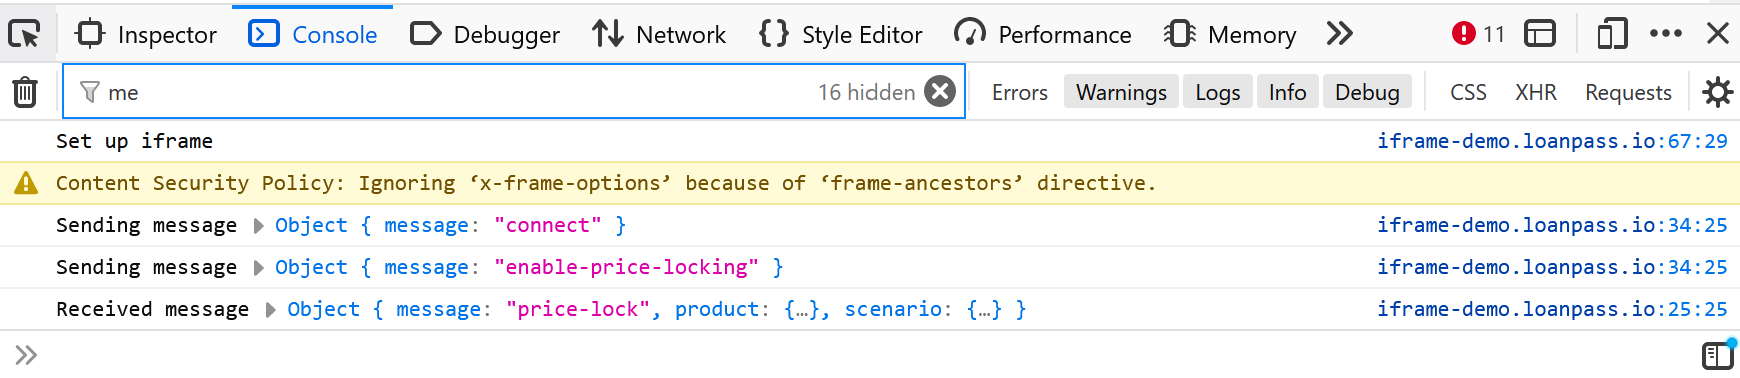
The <iframe> demo app has pretty verbose logging enabled, which should give a realistic idea for how communication is done with the API. Console logs can be seen in your browser's web inspector under the "Console" tab (which can usually be opened by right-clicking on the page and choosing "Inspect Element" or similar, or by pressing F12, or by pressing Ctrl-Shift-I or Cmd-Option-I or similar).
<iframe> API Prerequisites
The LoanPASS app disallows <iframe> embedding by default, so any new integration will have to be configured beforehand.
Configuring <iframe> embedding is currently a manual (but pretty quick) process. Reach out to the LoanPASS team to that you want us to turn on <iframe> embedding for your client, and let us know the source that will host the <iframe>. For example, if the LoanPASS app will be embedded on a page at https://app.example.com/integrations/loanpass, then the client will need to be configured with the URI https://app.example.com. See the MDN docs for more details on what kinds of sources are supported.
Security details
The <iframe> API was designed with security in mind, so things are locked down as much as possible. By default, all clients are configured to set the Content-Security-Policy HTTP header to frame-ancestors 'none', which prevents embedding the LoanPASS app within any other page. Each client can be configured with one or more sources to allow embedding the LoanPASS app in an <iframe>, which then allows any page under these sources to embed the LoanPASS app. We strongly encourage our clients to enable HTTPS encryption when embedding the LoanPASS app.
The LoanPASS app then listens for postMessage events to handle communication. This is handled entirely client-side, meaning no extra data needs to be sent between different backends-- the only data that is sent to LoanPASS is the data that would be sent by using the UI directly. Additionally, no data is implicitly sent to any client's backend either: their side of the <iframe> integration will need to be configured to send data to their backend if needed.
<iframe> API integration
After going through the Prerequisites and ensuring that your LoanPASS client is configured for embedding, integration should be fairly straightforward.
Embedding the <iframe>
An <iframe> should be added to the page with the src set to the appropriate URL for embedding. The URL for embedding will depend on your client access ID (for example, if your login page is at https://app.loanpass.io/login/example-client, your client access ID is example-client).
The correct URL to use for the <iframe> src attribute will be one of the following:
- Staging:
https://staging.loanpass.io/frame-redirect/{client_access_id} - Sandbox:
https://integrationsandbox.loanpass.io/frame-redirect/{client_access_id} - Production:
https://app.loanpass.io/frame-redirect/{client_access_id}
After embedding the <iframe>, iframe.contentWindow.postMessage({ type: "connect" }) should be called on the <iframe> to enable the <iframe> API. Afterwards, the <iframe> will send back a listening event, which indicates further messages can be sent.
Example: Vanilla JS
const loanpassOrigin = "https://app.loanpass.io";

const iframe = document.createElement("iframe");
iframe.src = `${loanpassOrigin}/frame-redirect/example-client`;
iframe.addEventListener("load", () => {
    // Connect to send and receive messages
  iframe.contentWindow.postMessage({ message: "connect" }, loanpassOrigin);
});

// Attach the message listener
window.addEventListener("message", event => {
  // Validate the message came from the LoanPASS <iframe>
  if (event.origin !== loanpassOrigin) {
    console.warn("Received message from unexpected origin", event);
    return;
  }

  // ... do something with the message ...
  console.log("Received message", event.data);
});

var container = document.getElementById("loanpass-container");
container.appendChild(iframe);
Example: React Hooks
const LoanpassWidget = props => {
  const iframeRef = useRef(null);
  const loanpassOrigin = "https://app.loanpass.io";

  // Create an event listener to listen for messages
  const messageListener = useCallback(event => {
    // Validate the message came from the LoanPASS <iframe>
    if (event.origin !== loanpassOrigin) {
      console.warn("Received message from unexpected origin", event);
      return;
    }

    // ... do something with the message ...
    console.log("Received message", event.data);
  }, [loanpassOrigin]);

  const onLoad = useCallback(() => {
    const contentWindow = iframeRef.current?.contentWindow;

    if (contentWindow == null) { return; }

    // Connect to send and receive messages
    contentWindow.postMessage({message: "connect"}, loanpassOrigin);
    console.log("Connected to window");
  }, [loanpassOrigin]);

  useEffect(() => {
    // Attach the message listener
    window.addEventListener("message", messageListener);

    return () => {
      // Clean up the message listener
      window.removeEventListener("message", messageListener);
    };
  }, [messageListener, loanpassOrigin]);

  return (
    <iframe
      ref={iframeRef}
      onLoad={onLoad}
      src={`${loanpassOrigin}/frame-redirect/example-client`}
    />
  );
};
Sending messages
After embedding the <iframe>, messages can be sent by calling iframe.contentWindow.postMessage({ /* message object*/ }). When sending a message, the postMessage function also takes an origin that should receive the message. As shown in the above examples, this should be set to the same origin used to embed the LoanPASS app.
The connect message should be sent first, then the integration should wait for the listening message! This will configure the LoanPASS app to listen for other messages, and will configure the LoanPASS app to send messages back to your app. The listening message indicates the that LoanPASS app is ready to handle more messages.
For a list of messages, see Messages. For more details about calling postMessage, see the MDN postMessage docs.
Receiving messages
After embedding the <iframe> and sending the connect message, the LoanPASS app will send any messages back to your app through postMessage calls. Your app can receive these events with a function like window.addEventListener("message", (event) => { /* ... */ }).
For good security hygiene, we recommend validating that event.origin matches the origin of the embedded LoanPASS app, as shown in the examples.
For a list of messages, see Messages. For more details about receiving postMessage events, see the MDN postMessage event docs.
<iframe> API messages
All messages sent to and from the LoanPASS app are plain JavaScript objects, with a message field indicating the type of message. Note that we may add more messages in the future, so to future-proof your integration, ensure unknown message types are ignored!
Sendable messages
These are messages that can be sent to loanpass from the host application.
connect
Connect to the LoanPASS <iframe> API. This message must be sent to the LoanPASS app before any other messages, and this message must be sent before any messages will be sent from LoanPASS back to your app.
After sending connect, the <iframe> will respond with the listening message once it's ready to receive more messages.
It's recommended that this message is sent in an event listener that listens for the <iframe>'s load event.
Fields
None
Example
iframe.addEventListener("load", function () {
  iframe.contentWindow.postMessage(
    {
      message: "connect",
    },
    loanpassOrigin
  );
});
create-pipeline-record
Creates a new pipeline record using the current state on the "Price a Loan" page including field values, selected product, and selected rate/lock period.
Fields
pipelineFieldValues: An array of pipeline-only fields to set and their values. The format matches the.creditApplicationFields[]schema from the/execute-productand/execute-summaryPublic API endpoints, and the fields are defined in the "Pipeline Settings" tab of the "Fields" page.
Example
iframe.contentWindow.postMessage(
  {
    message: "create-pipeline-record",
    pipelineFieldValues: [
      {
        fieldId: "field@borrower-last-name",
        value: {
          type: "string",
          value: "Smith",
        },
      },
      {
        fieldId: "field@loan-number",
        value: {
          type: "string",
          value: "12345",
        },
      },
    ],
  },
  loanpassOrigin
);
enable-float-requests
Set a flag to allow the "Float Request" button to send float requests back to the parent application.
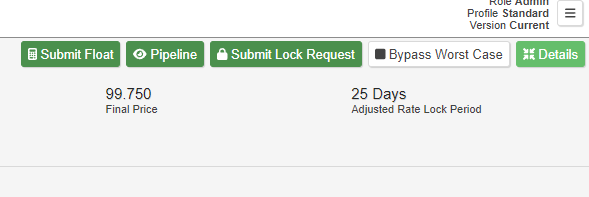
When viewing a pipeline record on the "Price a Loan" page, the user is presented with a "Submit Float" button. Before sending the enable-float-requests message, the "Submit Float" button will only create a new pipeline scenario for the selected pipeline record. After sending the enable-float-requests message, the "Submit Float" button will both create a new pipeline scenario as well as post a float-request message back to the parent application.
Example
iframe.contentWindow.postMessage(
  {
    message: "enable-float-requests",
  },
  loanpassOrigin
);
enable-price-locking
A legacy message used to set a flag that shows a "Lock Request" button in the UI. When clicked, the LoanPASS app will send a price-lock message containing loan information back to your app. This button does not record a lock in the ledger in the way that the normal lock request buttons will. Sending enable-price-lock doesn't itself handle price locking, it just enables integrators to grab the pricing data to handle price locking through another system.
The label of the button can be changed by setting the lockRequestLabel field on the message.
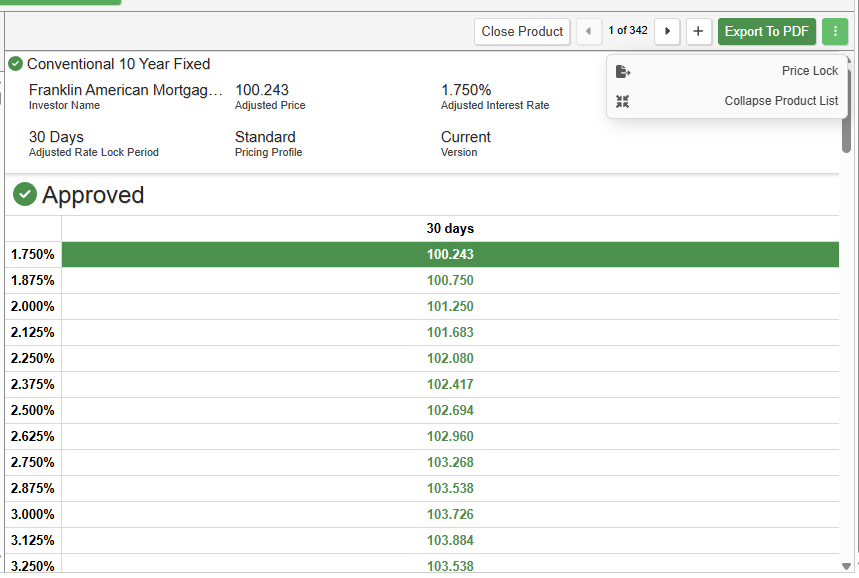
After this message is sent and after filling out the fields on the "Price a Loan" page, clicking into a product, then clicking one of the prices in the table, the 3 dot menu will display a button with the chosen label that when clicked will send a price-lock message back to the host application.
Fields
lockRequestLabel(optional): A string indicating what label to use for the price locking button. Defaults to "Lock Request". The same label will also be used after clicking the button, where the label will change to say "${lockRequestLabel} Sent".
Example
iframe.contentWindow.postMessage(
  {
    message: "enable-price-locking",
    lockRequestLabel: "Lock Request", // optional
  },
  loanpassOrigin
);
log-in
Automatically log the user in to LoanPASS with the given credentials.
NOTE: If the user is already signed in to the LoanPASS UI, then this message may cause them to log out and be logged in with the specified credentials. When this happens, the <iframe> may be reloaded. To account for this properly, you should wait for the listening message again before sending any more messages.
SECURITY NOTE: Like all messages, the log-in message is handled entirely client-side, so the given email and password will be sent to the server in exactly the same way as if the user had entered the email and password themselves. However, for security purposes, that leads to 2 details to consider:
- The end user can get the credentials. A tech-savvy user could trivially use the Web Inspector in their browser to find the email and password that were sent to the
<iframe>(say, by viewing the "Network" tab and looking for the "log in" API call). - The credentials should be stored and sent securely. The password for the user should be considered a secret, so it should be treated as such and standard best practices should be used.
Fields
clientAccessId: The client access ID to log in as. This should be the same as the client access ID used to embed the<iframe>.emailAddress: The email address of the account to sign in as.password: The password of the account to sign in as.
Example
Signing in a user
iframe.contentWindow.postMessage(
  {
    message: "log-in",
    clientAccessId: "example-client",
    emailAddress: "user@example.com",
    password: "password1234",
  },
  loanpassOrigin
);
Signing in a user on page load
// Track the current state of the user:
// 1. "pending": iframe just added to page, user may be logged out or logged in
// 2. "logged-in": `log-in` message sent, user is now logged in
let userState = "pending"; // "pending" | "logged-in"

const loanpassOrigin = "https://app.loanpass.io";
const clientAccessId = "example-client";
const emailAddress = "user@example.com";
const password = "password1234";

window.addEventListener("load", function () {
  console.log("page loaded");
  const iframe = document.createElement("iframe");

  const handleListening = () => {
    switch (userState) {
      case "pending":
        console.log("sending log in message...");
        iframe.contentWindow.postMessage(
          {
            message: "log-in",
            clientAccessId,
            emailAddress,
            password,
          },
          loanpassOrigin
        );
        userState = "logged-in";
        break;
      case "logged-in":
        console.log("log in completed");
        break;
    }
  };

  window.addEventListener("message", function (event) {
    if (event.origin !== loanpassOrigin) {
      console.warn("received message from unexpected origin", event);
      return;
    }

    console.log("received message", event.data);
    switch (event.data.message) {
      case "listening":
        handleListening();
        break;
    }
  });

  iframe.src = `${loanpassOrigin}/frame-redirect/${clientAccessId}`;
  iframe.addEventListener("load", function () {
    console.log("iframe load event fired");

    if (iframe.contentWindow == null) {
      return;
    }

    console.log("connecting...");
    iframe.contentWindow.postMessage(
      {
        message: "connect",
      },
      loanpassOrigin
    );
  });

  document.getElementById("iframe-container").appendChild(iframe);
});
log-out
Log out the current user if they are logged in.
NOTE: Sending this message may trigger the <iframe> to reload! To continue receiving messages after sending the log-out message, make sure the connect message is sent after the load event triggers on the <iframe>. See the connect message for more details.
Fields
clientAccessId: The client access ID of the login page to show.
Example
iframe.contentWindow.postMessage(
  {
    message: "log-out",
    clientAccessId: "example-client",
  },
  loanpassOrigin
);
See log-in for more details about logging the user back in after logging out.
set-fields
Fill in fields on the "Price a Loan" page with preset values.
Fields
Fill in fields on the "Price a Loan" page with preset values. Calling set-fields is very similar to loading an existing scenario, except the data is controlled by the integration rather than the LoanPASS backend.
Fields
fields: An array of specifying fields to set and their values. The format matches the.creditApplicationFields[]schema from the/execute-productand/execute-summaryPublic API endpoints.fieldId: The field ID.value: An object describing the value of the field, with atypefield indicating the type of value.
Example
iframe.contentWindow.postMessage(
  {
    message: "set-fields",
    fields: [
      {
        fieldId: "field@occupancy-type",
        value: {
          type: "enum",
          enumTypeId: "occupancy-type",
          variantId: "primary-residence",
        },
      },
      {
        fieldId: "field@desired-loan-term",
        value: {
          type: "duration",
          unit: "months",
          count: "6",
        },
      },
      {
        fieldId: "field@number-of-units",
        value: {
          type: "number",
          value: "1",
        },
      },
    ],
  },
  loanpassOrigin
);
set-pipeline-record-id
Loads an existing pipeline record on the "Price a Loan" page. You may choose to pass an optional list of field values to overwrite the values loaded by the pipeline record.
Fields
pipelineRecordId: The ID of the pipeline record you want to load.overrideCreditApplicationFields: An optional array of fields to set and their values. The format matches the.creditApplicationFields[]schema from the/execute-productand/execute-summaryPublic API endpoints. If left empty the pipeline record will use the values stored within itself. If desired, passing a null value with afieldIdwill clear out that input from the loaded field values.
Examples
- Loading a Record
iframe.contentWindow.postMessage(
  {
    message: "set-pipeline-record-id",
    pipelineRecordId: "51",
    // This will retain the field values saved in the pipeline record
    overrideCreditApplicationFields: [],
  },
  loanpassOrigin
);
- Overriding Fields
iframe.contentWindow.postMessage(
  {
    message: "set-pipeline-record-id",
    pipelineRecordId: "51",
    // This will override fields stored in the pipeline record
    overrideCreditApplicationFields: [
      {
        fieldId: "field@occupancy-type",
        value: {
          type: "enum",
          enumTypeId: "occupancy-type",
          variantId: "primary-residence",
        },
      },
      {
        fieldId: "field@desired-loan-term",
        value: {
          type: "duration",
          unit: "months",
          count: "6",
        },
      },
      {
        fieldId: "field@number-of-units",
        value: {
          type: "number",
          value: "1",
        },
      },
    ],
  },
  loanpassOrigin
);
- Clearing out fields using a
nullvalue
iframe.contentWindow.postMessage(
  {
    message: "set-pipeline-record-id",
    pipelineRecordId: "51",
    // This will override fields stored in the pipeline record by clearing the
    // value if it exists. Note that the entire outer `value` property is where
    // null should be passed
    overrideCreditApplicationFields: [
      {
        fieldId: "field@occupancy-type",
        value: null,
      },
      {
        fieldId: "field@desired-loan-term",
        value: null,
      },
      {
        fieldId: "field@number-of-units",
        value: null,
      },
    ],
  },
  loanpassOrigin
);
set-version
Tell the <iframe> which version the host integration is using.
Fields
version: A version string.
Example
iframe.contentWindow.postMessage(
  {
    message: "set-version",
    version: "1",
  },
  loanpassOrigin
);
Loading the most current version
iframe.contentWindow.postMessage(
  {
    message: "set-version",
    version: "current",
  },
  loanpassOrigin
);
Receivable messages
These are messages that LoanPASS can send back to the host application.
enable-float-requests-error
Sent if enable-float-requests could not be applied.
Fields
error: An error message.
Example
{
  "message": "enable-float-requests-error",
  "error": "Failed to float requests. Please contact your system administrator for assistance."
}
enable-price-locking-error
Sent if enable-price-locking could not be applied.
Fields
error: An error message.
Example
{
  "message": "enable-price-locking-error",
  "error": "Failed to enable price locking. Please contact your system administrator for assistance."
}
float-request
Sent when a user clicks the "Submit Float" button in the UI after the enable-float-requests message is sent. The shape of this message is the same as the price-lock message.
Fields
role: Contains details about the user's active role.id: The role ID.nameThe display name of the role.
pricingProfile: Contains details about the user's active pricing profile.id: The pricing profile ID.nameThe display name of the pricing profile.
product: Contains details about the product that was price locked.id: The product ID.nameThe display name of the product.
investor: Contains details about the investor of the product that was price locked.id: The investor's ID.name: The display name of the investor.
scenario: The details about the price scenario that was locked. The schema matches the.priceScenarios[]schema returned from the/execute-productPublic API endpoint.status: The status of the price scenario, such asapproved,rejected, etc.adjustedRate: The rate with rate adjustments applied.adjustedPriceThe price with price adjustments applied.priceScenarioFields: An array of price scenario fields and values.fieldId: The field ID.value: An object describing the value of the field, ornullif the field has no value.
calculatedFields: An array of calculated fields and their values for this price scenario.fieldId: The calculated field ID.value: An object describing the value of the field, ornullif the field has no value.
creditApplicationFields: An array of fields and their values that were filled in by the user for the price scenario. This corresponds to thecreditApplicationFieldsfield for the/execute-productPublic API endpoint.fieldId: The input's field ID.value: An object describing the value of the field.
Example
{
  "message": "float-request",
  "role": {
    "id": "11",
    "name": "Loan Officer"
  },
  "pricingProfile": {
    "id": "22",
    "name": "Standard"
  },
  "investor": {
    "id": "123",
    "name": "Test Investor",
    "code": "TI",
    "isPricingEnabled": true
  },
  "product": {
    "id": "1234",
    "code": "EXAMPLE",
    "name": "Example Product",
    "description": "Example product",
    "activationTimestamp": "2021-01-01T00:00:00Z",
    "deactivationTimestamp": null,
    "investorId": "123"
  },
  "scenario": {
    "id": "00000000-0000-0000-0000-000000000000",
    "priceScenarioFields": [
      {
        "fieldId": "base-interest-rate",
        "value": {
          "type": "number",
          "value": "1.0"
        }
      },
      {
        "fieldId": "rate-lock-period",
        "value": {
          "type": "duration",
          "count": "15",
          "unit": "days"
        }
      },
      {
        "fieldId": "base-price",
        "value": {
          "type": "number",
          "value": "101.000"
        }
      }
    ],
    "calculatedFields": [
      {
        "fieldId": "calc@fsb-lpmi-refinance",
        "value": {
          "type": "number",
          "value": "0.000"
        }
      },
      {
        "fieldId": "calc@fsb-jumbo-max-price",
        "value": null
      },
      {
        "fieldId": "calc-field@ah-va-purch-tier",
        "value": {
          "type": "number",
          "value": "4"
        }
      }
    ],
    "adjustedRate": "1.75",
    "adjustedRateLockPeriod": {
      "count": "15",
      "unit": "days"
    },
    "adjustedPrice": "101.000",
    "status": "approved",
    "priceAdjustments": [
      {
        "ruleId": "1234",
        "amount": "0.25",
        "description": "Price adjustment 1"
      },
      {
        "ruleId": "5678",
        "amount": "0.25",
        "description": "Price adjustment 2"
      }
    ],
    "marginAdjustments": [
      {
        "ruleId": "12345",
        "amount": "-0.300",
        "description": "Margin adjustment"
      }
    ],
    "rateAdjustments": [],
    "stipulations": []
  },
  "creditApplicationFields": [
    {
      "fieldId": "field@occupancy-type",
      "value": {
        "type": "enum",
        "enumTypeId": "occupancy-type",
        "variantId": "primary-residence"
      }
    },
    {
      "fieldId": "field@loan-purpose",
      "value": {
        "type": "enum",
        "enumTypeId": "loan-purpose",
        "variantId": "purchase"
      }
    },
    {
      "fieldId": "field@decision-credit-score",
      "value": {
        "type": "number",
        "value": "750"
      }
    },
    {
      "fieldId": "field@state",
      "value": {
        "type": "string",
        "format": "us-state-code",
        "value": "TX"
      }
    },
    {
      "fieldId": "field@property-type",
      "value": {
        "type": "enum",
        "enumTypeId": "property-type",
        "variantId": "single-family"
      }
    },
    {
      "fieldId": "field@base-loan-amount",
      "value": {
        "type": "number",
        "value": "400000.00"
      }
    }
  ]
}
float-request-error
Sent if a float-request could not be fulfilled.
Fields
error: An error message.
Example
{
  "message": "float-request-error",
  "error": "Failed to submit float request from iframe message. Please contact your system administrator for assistance."
}
float-requests-enabled
Confirmation that float requests have been enabled after sending enable-float-requests.
Fields
None
Example
{ "message": "float-requests-enabled" }
listening
Sent after the <iframe> receives the connect message and is ready to receive more messages.
Fields
None
Example
{ "message": "listening" }
lock-ledger-update-error
Sent if LoanPASS failed to update the lock ledger.
Fields
error: An error message.
Example
{
  "message": "lock-ledger-update-error",
  "error": "Can't submit lock request when pricing is disabled."
}
lock-ledger-updated
Sent when a lock ledger update occurs for the active pipeline record.
Fields
pipelineRecord: The current pipeline record object.lockLedgerEntries: An array of lock ledger entry objects for this record.
Example
{
  "message": "lock-ledger-updated",
  "pipelineRecord": {
    "id": "1",
    "ownerId": "5",
    "createdAt": "2023-10-12T18:23:06.843820Z",
    "updatedAt": "2024-08-22T15:59:42.929269Z",
    "status": "open",
    "lockState": {
      "lockStatus": {
        "kind": "unlocked"
      },
      "lastActionTaken": null,
      "lastLockDeniedDate": null,
      "lastExpirationDate": null,
      "actionHistory": []
    },
    "pricingProfileId": "2",
    "pipelineOnlyFieldValues": [
      {
        "fieldId": "field@borrower-last-name",
        "value": {
          "type": "string",
          "value": "Jones"
        }
      }
    ],
    "pricingNotificationFieldValues": [],
    "preferredScenario": {
      "pipelineRecordId": "1",
      "id": "1",
      "pricingProfileId": null,
      "name": "Initial Inputs",
      "createdAt": "2023-10-12T18:23:06.843820Z",
      "preferred": true,
      "creditApplicationFieldValues": [
        {
          "fieldId": "field@occupancy-type",
          "value": {
            "type": "enum",
            "enumTypeId": "occupancy-type",
            "variantId": "primary-residence"
          }
        },
        {
          "fieldId": "field@purchase-price",
          "value": {
            "type": "number",
            "value": "800000.00"
          }
        },
        {
          "fieldId": "field@loan-purpose",
          "value": {
            "type": "enum",
            "enumTypeId": "loan-purpose",
            "variantId": "purchase"
          }
        }
      ],
      "selectedProductId": "2120",
      "selectedPriceScenarioInfo": {
        "type": "rate-with-lock-period",
        "selectedInterestRate": "2.5",
        "selectedLockPeriod": {
          "count": "30",
          "unit": "days"
        }
      },
      "isFloat": false
    },
    "outputFieldValues": [
      {
        "fieldId": "calc@adjusted-price",
        "value": {
          "type": "number",
          "value": "100.965"
        }
      }
    ],
    "scenarios": [
      {
        "pipelineRecordId": "1",
        "id": "1",
        "pricingProfileId": null,
        "name": "Initial Inputs",
        "createdAt": "2023-10-12T18:23:06.843820Z",
        "preferred": true,
        "creditApplicationFieldValues": [
          {
            "fieldId": "field@occupancy-type",
            "value": {
              "type": "enum",
              "enumTypeId": "occupancy-type",
              "variantId": "primary-residence"
            }
          },
          {
            "fieldId": "field@purchase-price",
            "value": {
              "type": "number",
              "value": "800000.00"
            }
          }
        ],
        "selectedProductId": "2120",
        "selectedPriceScenarioInfo": {
          "type": "rate-with-lock-period",
          "selectedInterestRate": "2.5",
          "selectedLockPeriod": {
            "count": "30",
            "unit": "days"
          }
        },
        "isFloat": false
      }
    ],
    "encompassOverrides": []
  },
  "lockLedgerEntries": [
    {
      "pipelineRecordId": "1",
      "id": "1",
      "createdAt": "2025-08-29T18:35:23.107931Z",
      "createdBy": "1",
      "autoConfirmed": false,
      "state": {
        "lockStatus": {
          "kind": "requested",
          "lockedFields": {
            "product_code": "ARCWCONFF30FNM",
            "request_date": "2025-08-29",
            "expiration_date": "2025-09-28",
            "lock_period": {
              "count": "30",
              "unit": "days"
            },
            "effective_lock_ledger_entry_id": "1"
          },
          "statusIfDenied": {
            "kind": "unlocked"
          }
        },
        "lastActionTaken": "submit-lock-request",
        "lastLockDeniedDate": null,
        "lastExpirationDate": null,
        "actionHistory": [
          {
            "createdAt": "2025-08-29T18:35:22.467601407Z",
            "action": "submit-lock-request"
          }
        ]
      },
      "kind": "submit-lock-request",
      "inputs": {
        "publishedVersionNumber": "1",
        "pricingProfileId": "2",
        "selectedProductId": "2120",
        "selectedPriceScenarioInfo": {
          "type": "rate-with-lock-period",
          "selectedInterestRate": "2.5",
          "selectedLockPeriod": {
            "count": "30",
            "unit": "days"
          }
        },
        "selectedPriceScenarioId": "746b3ffe3c9eeeb699caa62c7f1d6fd2",
        "requestDate": "2025-08-29",
        "defaultFieldValues": [],
        "creditApplicationFieldValues": [
          {
            "fieldId": "field@occupancy-type",
            "value": {
              "type": "enum",
              "enumTypeId": "occupancy-type",
              "variantId": "primary-residence"
            }
          },
          {
            "fieldId": "field@purchase-price",
            "value": {
              "type": "number",
              "value": "800000.00"
            }
          }
        ],
        "bypassWorstCase": false
      },
      "outputs": {
        "productId": "2120",
        "productName": "30 Year Fixed Rate FNMA Conventional",
        "productCode": "ARCWCONFF30FNM",
        "investorName": "ARC Home - Wholesale",
        "investorCode": "ARCW",
        "isPricingEnabled": true,
        "productFields": [
          {
            "fieldId": "field@product-channel",
            "value": {
              "type": "enum",
              "enumTypeId": "channel",
              "variantId": "wholesale"
            }
          },
          {
            "fieldId": "field@mortgage-type",
            "value": {
              "type": "enum",
              "enumTypeId": "mortgage-type",
              "variantId": "conventional"
            }
          }
        ],
        "productCalculatedFields": [
          {
            "fieldId": "calc@loan-term-allowed",
            "value": {
              "type": "enum",
              "enumTypeId": "yes-no",
              "variantId": "yes"
            }
          },
          {
            "fieldId": "calc@amortization-type-allowed",
            "value": {
              "type": "enum",
              "enumTypeId": "yes-no",
              "variantId": "yes"
            }
          }
        ],
        "rateSheetEffectiveTimestamp": "2020-10-19T15:38:00Z",
        "priceScenarioFields": [
          {
            "fieldId": "base-interest-rate",
            "value": {
              "type": "number",
              "value": "2.5"
            }
          },
          {
            "fieldId": "rate-lock-period",
            "value": {
              "type": "duration",
              "count": "30",
              "unit": "days"
            }
          },
          {
            "fieldId": "base-price",
            "value": {
              "type": "number",
              "value": "100.935"
            }
          }
        ],
        "priceScenarioCalculatedFields": [
          {
            "fieldId": "calc@ah-va-purch-state-tier",
            "value": {
              "type": "number",
              "value": "0"
            }
          },
          {
            "fieldId": "calc@fnma-high-ltv-cap",
            "value": {
              "type": "number",
              "value": "-10.000"
            }
          }
        ],
        "adjustedRate": "2.5",
        "adjustedPrice": "100.965",
        "adjustedRateLockPeriod": {
          "count": "30",
          "unit": "days"
        },
        "status": "approved",
        "reviewRequirements": [],
        "priceAdjustments": [
          {
            "ruleId": "1750",
            "amount": "0.03",
            "description": "LLPA - ARC Wholesale FNMA/FHLMC Conventional & HomeReady/Home Possible Adjustment"
          }
        ],
        "marginAdjustments": [],
        "rateAdjustments": [],
        "finalPriceAdjustments": [],
        "finalRateAdjustments": [],
        "finalMarginAdjustments": [],
        "stipulations": [
          {
            "ruleId": "2063",
            "text": "..."
          }
        ],
        "publishedVersionNumber": "1",
        "startingAdjustedRate": null,
        "startingAdjustedPrice": null,
        "undiscountedRate": "2.5"
      }
    }
  ]
}
log-in-error
Sent after a failed log in attempt using the log-in message.
Fields
error: An error message.
Example
{
  "message": "log-in-error",
  "error": "Invalid credentials"
}
logged-in
Sent after succesfully logging in with a log-in message.
Fields
None
Example
{ "message": "logged-in" }
pipeline-record-created
Sent after succesfully creating a pipeline record using the create-pipeline-record message. Returns the ID of the newly created record.
Fields
pipelineRecordId: The ID of the created pipeline record.
Example
iframe.contentWindow.postMessage(
  {
    message: "pipeilne-record-created",
    pipelineRecordId: "51",
  },
  loanpassOrigin
);
pipeline-record-creation-error
Sent after a failed attempt to create a pipeline record.
Fields
error: An error message.
Example
{
  "message": "pipeline-record-creation-error",
  "error": "Failed to create pipeline. Please contact your system administrator for assistance."
}
price-lock
Sent when a user clicks the "Lock Request" button in the UI after the enable-price-locking message is sent.
Fields
role: Contains details about the user's active role.id: The role ID.nameThe display name of the role.
pricingProfile: Contains details about the user's active pricing profile.id: The pricing profile ID.nameThe display name of the pricing profile.
product: Contains details about the product that was price locked.id: The product ID.nameThe display name of the product.
investor: Contains details about the investor of the product that was price locked.id: The investor's ID.name: The display name of the investor.
scenario: The details about the price scenario that was locked. The schema matches the.priceScenarios[]schema returned from the/execute-productPublic API endpoint.status: The status of the price scenario, such asapproved,rejected, etc.adjustedRate: The rate with rate adjustments applied.adjustedPriceThe price with price adjustments applied.priceScenarioFields: An array of price scenario fields and values.fieldId: The field ID.value: An object describing the value of the field, ornullif the field has no value.
calculatedFields: An array of calculated fields and their values for this price scenario.fieldId: The calculated field ID.value: An object describing the value of the field, ornullif the field has no value.
creditApplicationFields: An array of fields and their values that were filled in by the user for the price scenario. This corresponds to thecreditApplicationFieldsfield for the/execute-productPublic API endpoint.fieldId: The input's field ID.value: An object describing the value of the field.
Example
{
  "message": "price-lock",
  "role": {
    "id": "11",
    "name": "Loan Officer"
  },
  "pricingProfile": {
    "id": "22",
    "name": "Standard"
  },
  "investor": {
    "id": "123",
    "name": "Test Investor",
    "code": "TI",
    "isPricingEnabled": true
  },
  "product": {
    "id": "1234",
    "code": "EXAMPLE",
    "name": "Example Product",
    "description": "Example product",
    "activationTimestamp": "2021-01-01T00:00:00Z",
    "deactivationTimestamp": null,
    "investorId": "123"
  },
  "scenario": {
    "id": "00000000-0000-0000-0000-000000000000",
    "priceScenarioFields": [
      {
        "fieldId": "base-interest-rate",
        "value": {
          "type": "number",
          "value": "1.0"
        }
      },
      {
        "fieldId": "rate-lock-period",
        "value": {
          "type": "duration",
          "count": "15",
          "unit": "days"
        }
      },
      {
        "fieldId": "base-price",
        "value": {
          "type": "number",
          "value": "101.000"
        }
      }
    ],
    "calculatedFields": [
      {
        "fieldId": "calc@fsb-lpmi-refinance",
        "value": {
          "type": "number",
          "value": "0.000"
        }
      },
      {
        "fieldId": "calc@fsb-jumbo-max-price",
        "value": null
      },
      {
        "fieldId": "calc-field@ah-va-purch-tier",
        "value": {
          "type": "number",
          "value": "4"
        }
      }
    ],
    "adjustedRate": "1.75",
    "adjustedRateLockPeriod": {
      "count": "15",
      "unit": "days"
    },
    "adjustedPrice": "101.000",
    "status": "approved",
    "priceAdjustments": [
      {
        "ruleId": "1234",
        "amount": "0.25",
        "description": "Price adjustment 1"
      },
      {
        "ruleId": "5678",
        "amount": "0.25",
        "description": "Price adjustment 2"
      }
    ],
    "marginAdjustments": [
      {
        "ruleId": "12345",
        "amount": "-0.300",
        "description": "Margin adjustment"
      }
    ],
    "rateAdjustments": [],
    "stipulations": []
  },
  "creditApplicationFields": [
    {
      "fieldId": "field@occupancy-type",
      "value": {
        "type": "enum",
        "enumTypeId": "occupancy-type",
        "variantId": "primary-residence"
      }
    },
    {
      "fieldId": "field@loan-purpose",
      "value": {
        "type": "enum",
        "enumTypeId": "loan-purpose",
        "variantId": "purchase"
      }
    },
    {
      "fieldId": "field@decision-credit-score",
      "value": {
        "type": "number",
        "value": "750"
      }
    },
    {
      "fieldId": "field@state",
      "value": {
        "type": "string",
        "format": "us-state-code",
        "value": "TX"
      }
    },
    {
      "fieldId": "field@property-type",
      "value": {
        "type": "enum",
        "enumTypeId": "property-type",
        "variantId": "single-family"
      }
    },
    {
      "fieldId": "field@base-loan-amount",
      "value": {
        "type": "number",
        "value": "400000.00"
      }
    }
  ]
}
price-locking-enabled
Confirmation that price locking has been enabled after sending enable-price-locking.
Fields
None
Example
{ "message": "price-locking-enabled" }
set-fields-error
Sent if set-fields contained invalid or unusable data.
Fields
error: An error message.
Example
{
  "message": "set-fields-error",
  "error": "There was an error setting fields."
}
set-fields-success
Confirmation that the fields provided in set-fields were applied.
Fields
None
Example
{ "message": "set-fields-success" }
set-pipeline-record-id-error
Sent if the requested pipeline record could not be loaded.
Fields
error: An error message.
Example
{
  "message": "set-pipeline-record-id-error",
  "error": "Failed to set pipeline record."
}
set-pipeline-record-id-success
Confirmation that the record requested by set-pipeline-record-id was loaded.
Fields
None
Example
{ "message": "set-pipeline-record-id-success" }
set-version-error
Sent if set-version failed.
Fields
error: An error message.
Example
{
  "message": "set-version-error",
  "error": "Failed to set version (invalid version). Please contact your system administrator for assistance."
}
set-version-success
Confirmation that the version provided in set-version was recorded.
Fields
None
Example
{ "message": "set-version-success" }
LoanPASS Public API
The LoanPASS public API allows for robust integration between the LoanPASS pricing engine and other services. Integrations can make RESTful API calls to read configuration values or to call the pricing engine, which then returns a detailed JSON response with the pricing details.
Documentation
OpenAPI/Swagger documentation for the public API is automatically published for each environment:
- Staging: https://stagingapi.loanpass.io/v1/swagger
- Sandbox: https://integrationsandboxapi.loanpass.io/v1/swagger
- Production: https://api.loanpass.io/v1/swagger
Encompass Custom Form
LoanPASS provides a custom form for the Encompass Loan Origination System that allows users to get pricing data from LoanPASS and lock loans without leaving Encompass. The form is updated periodically by releasing a new EMPKG file. The latest version of this is available here.
There are two files available—a DLL and an EMPKG file. In most cases, you'll want to download the EMPKG.
The DLL provides a separate screen that connects to LoanPASS and retrieves pricing data, similar to the Price A Loan screen in the LoanPASS web application. If you wish, you can build your own custom form that uses this screen, but the EMPKG file provides a pre-built custom form along with it and is recommended for most use cases.
Installing and updating the custom form
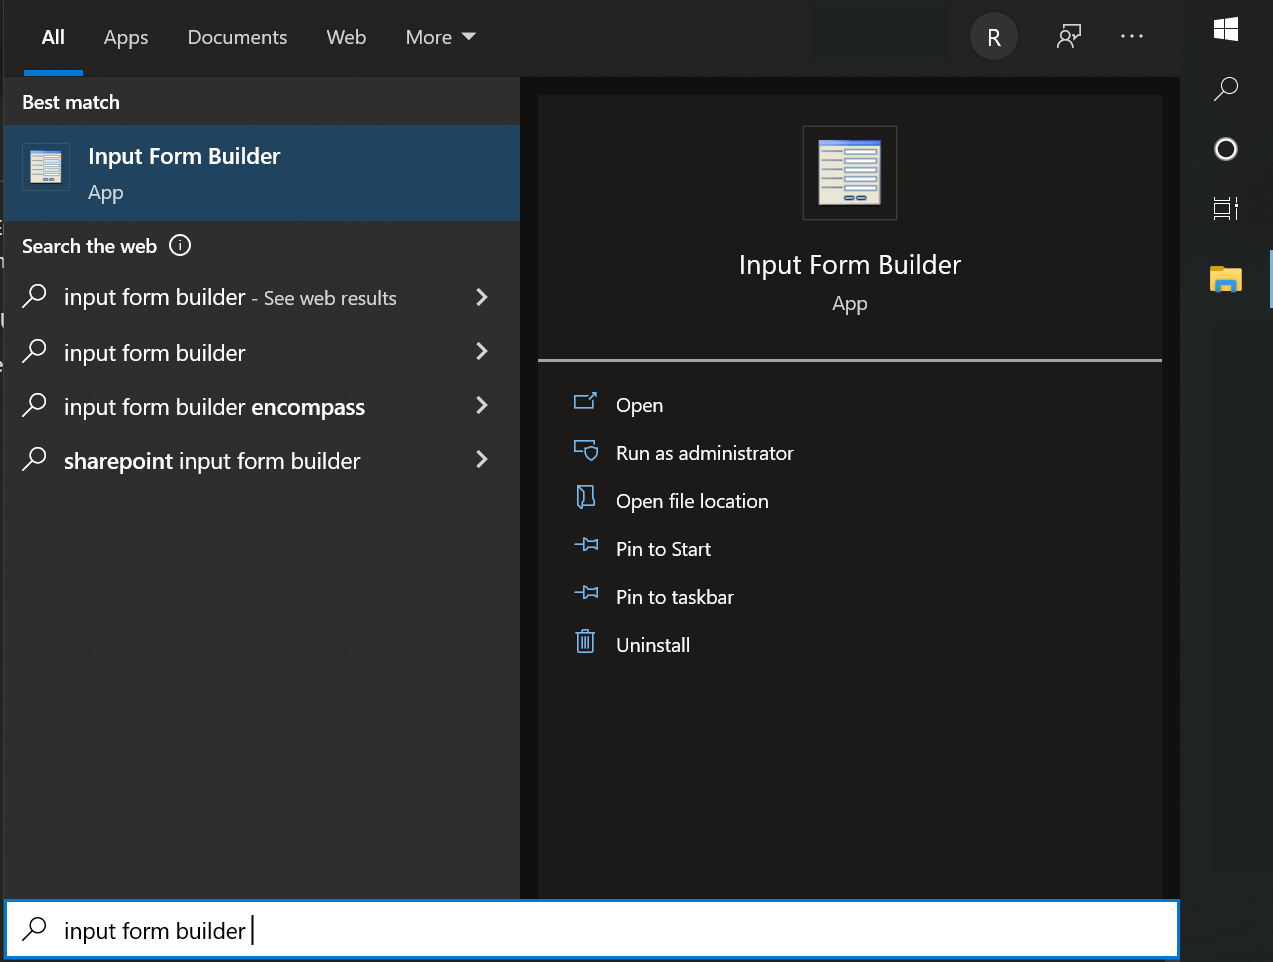
To install or update the form, download the .empkg file (NOT the .dll) from the link above. Then open the Encompass Input Form Builder on your computer and log in. If you can't find it, press the Windows key and type "input form builder", then press Enter.
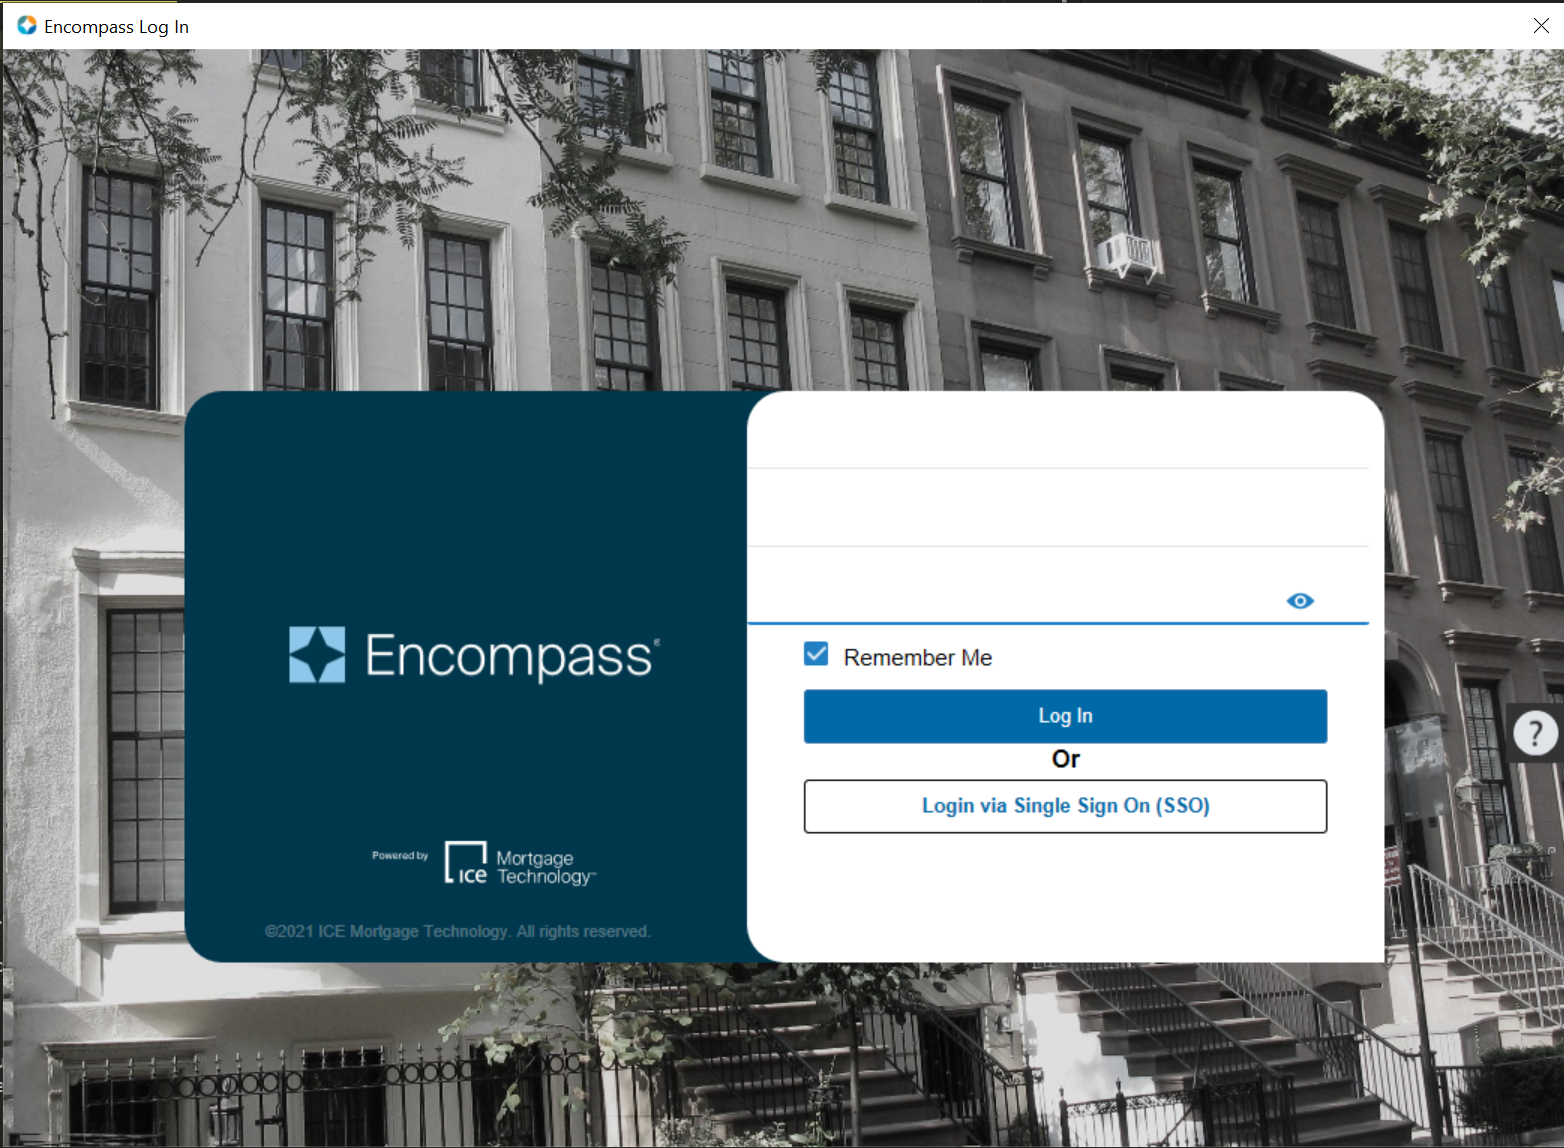
Next, log in to the Input Form Builder with your Encompass account.
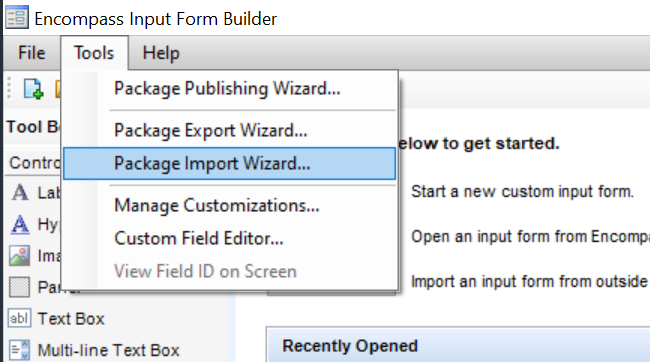
In the Tools menu, click "Package Import Wizard...".
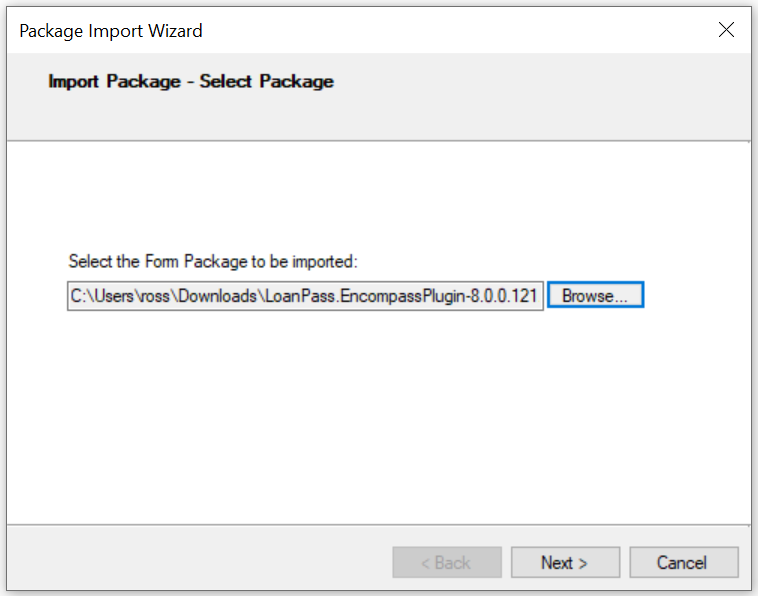
In the wizard, click "Browse..." and open the EMPKG file you downloaded earlier.
Click Next. You should see a dialog listing one input screen and one assembly to be imported (these items are both contained within the EMPKG file).
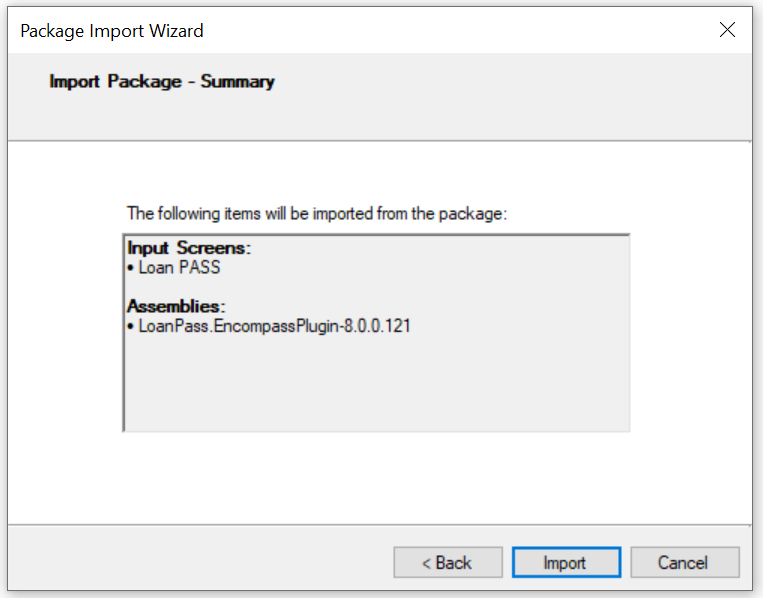
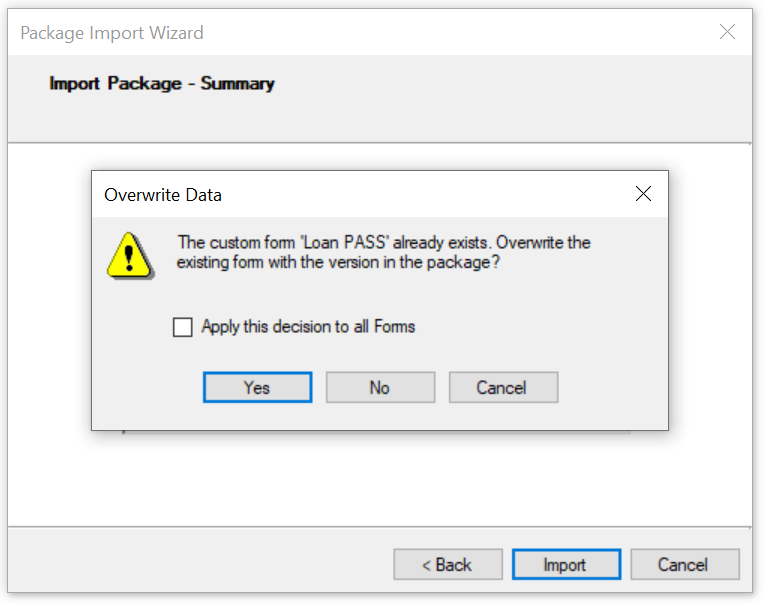
Click "Import". If you get a dialog asking you whether to overwrite the existing form, click "Yes".
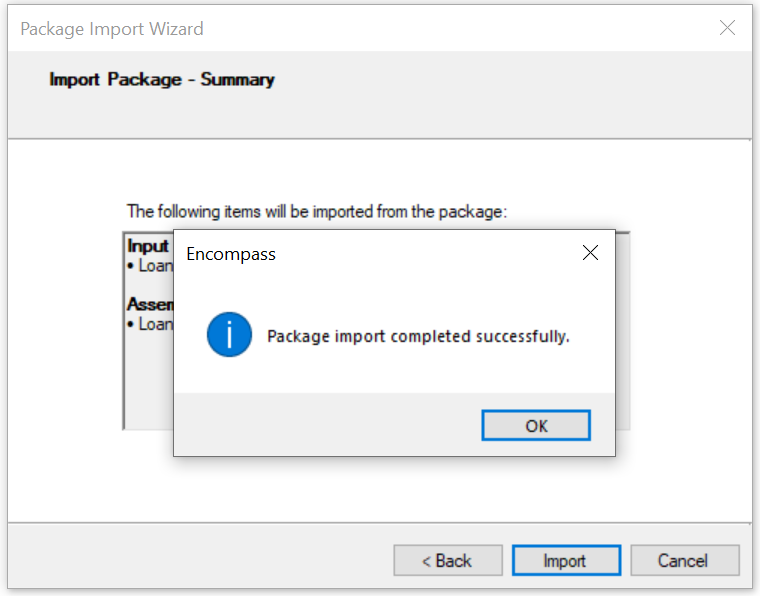
You should get a dialog saying the import was successful. Click "OK".
You'll get another dialog asking you if want to open the imported form in the editor. You don't need to do anything else to the form, so click "No" and close the Input Form Builder.

Next, start Encompass.
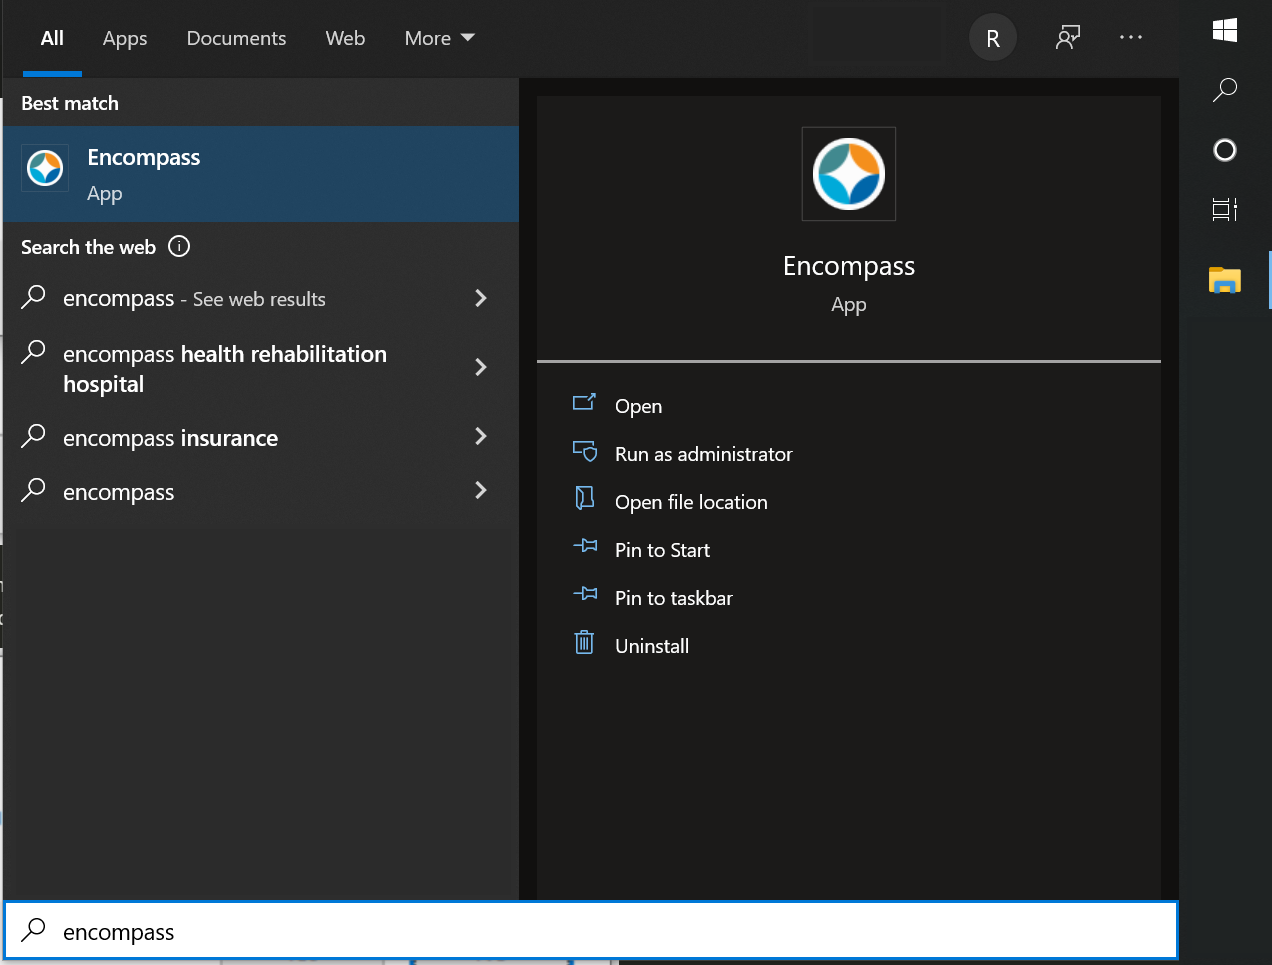
Log in the same way you did with the form builder. Then click on the Pipeline tab.
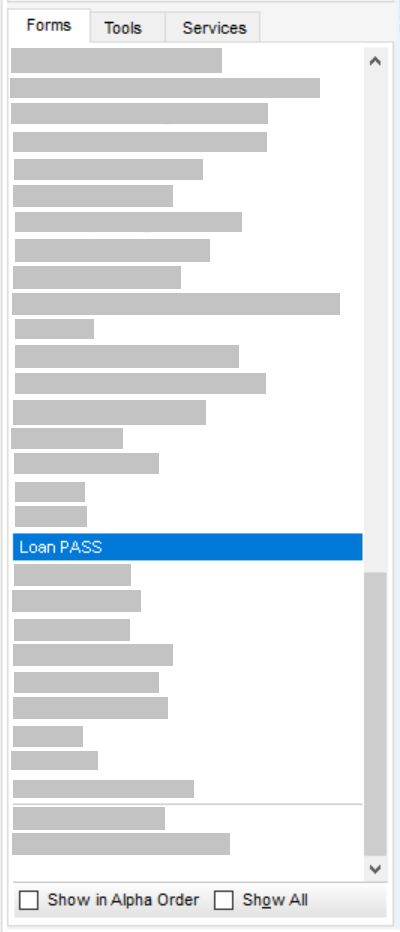
Open a loan in the list shown on that tab, then click on the Forms tab in the lower-left section of the screen and click on "Loan PASS" in the list.
The custom form should load in Encompass. Scroll down and click the "Get Pricing" button to test it. A separate window should come up and display a pricing form similar to the "Price A Loan" screen in the LoanPASS web application.
That's it! Your LoanPASS Encompass custom form is now up to date.
LoanScript
LoanScript is a scripting language used to define custom operations on LoanPASS data. Various screens in LoanPASS will allow you to input scripts. For example, the screen below allows you to populate Encompass lock request fields with LoanPASS data. The panel on the left selects which lock request field to populate, and the text editor on the right allows you to write LoanScript code that defines which LoanPASS data should be read and how it should be transformed into values appropriate for Encompass.

Don't worry about what the code means for now, we'll explain how to write LoanScript later on.
Getting more information
When writing LoanScript, sometimes you'll want more context or information about your code than the raw text can provide. There are a few ways to get these details. Again, don't worry about what this information means for now. It's only important that you know how to get it for later.
Type information
To get the type of data outputted by a section of your code, simply hover over that section with your mouse.
You can also see all of the variables, functions, and types available to use in your script in the pane on the right side of the screen.
Error descriptions
The editor inspects your code for common problems that may cause issues when the code is actually run. These errors will be displayed by a red squiggly line under the problematic sections. Again, you can hover your mouse over these sections to get detailed information about the problem.
Autocompletion
Some LoanScript code may require one value from a list to be written in a particular place. When this is the case, the editor will show a list of available options as you type. This list is narrowed to fit what you've already typed. You can either write out the entire option yourself, or you can select one from the list by either clicking on it or scrolling to it with the arrow keys and then pressing Enter or Tab.
The LoanScript language
This guide will explain LoanScript itself—what the code means, what you can do with it, and how to write it.
Basic types
Every script outputs exactly one piece of data, and this data can be one of several types. This list describes each type, and how to write a simple script that outputs a value of that type.
- Blank: This is the simplest LoanScript type, and it represents a value of "nothing". This is equivalent to a blank/empty credit application field on the pricing screen, for example, or a
nullvalue in many other programming languages. Below is a script that outputs ablankvalue. Notice that all we've done is write the value—that's the script's output. Every LoanScript script must end with a value or something that produces a value (called an "expression", more on that later). That final value is what the script outputs.blank - Boolean: This is a simple
trueorfalsevalue.truefalse - Number: This can be any decimal or integer number and may be positive, negative, or zero. These can be written like
3,1.2,0,-100, or-12.5, for example.-12.5 - Text: This can be any piece of text and must be surrounded by double quotes.
"Hello, world!" - Date: Dates can be created by writing the date in Month/Day/Year format enclosed in
DATE(...), like the code below, which has the value June 12th, 2023:DATE(6/12/2023) - Day duration: This is any length of time that can be specified in an exact number of days. This is written as a number followed by the keyword
day,days,week, orweeks. The duration1 weekis exactly equal to7 days,2 weeksis14 days, etc. Pluralization is not enforced (for example, you can write2 weekif you wish), but is encouraged to make your scripts more readable.45 days - Month duration: This is any length of time that can be specified in an exact number of months. This is written as a number followed by
month,months,quarter,quarters,year, oryears. The duration1 quarteris exactly equal to3 monthsand1 yearis equal to4 quartersor12 months. The same pluralization rules (or lack thereof) apply to this type as well.30 years
Variables
A variable is simply a name that represents a value. This code creates a variable named x that represents the value 5
let x = 5
Variable assignment statements like the one above do not output anything, so that line by itself is not a valid script, because a script must have an output. The script below is valid. It outputs the number 5 by assigning it to x and then outputting x:
let x = 5

x
Comments
Sometimes it's useful to write notes in your code. You can do this by writing two forward slashes followed by your comment. Everything on the same line after the slashes will not be executed.
// This is a comment to explain the script below

let my_variable = 123 // You can put comments on the same line as your code

// You can also put comments between lines of code.
// If you want multiple lines of comments

my_variable

// This is a comment after the script
Complex types
LoanScript supports a few types that are actually collections of pieces of data of simpler types.
-
List: This is a series of values. Values in a list may be of the same type or of different types. They are separated by commas and surrounded by square brackets.
[1, 2, 3]or
[12.5, "some text", true, 25 years]The items in a list can be accessed by appending square brackets to a list value and putting the position of the desired item between the brackets. Positions start at zero, so the position of the first item is
0, the position of the second is1, and so on. For examplemy_list[1]outputs the second item inmy_list. This script creates a list of 3 names and then outputs the second one ("Alice"):let people = [ "Fred", "Alice", "Leslie" ] people[1] -
Object: An object is similar to a list in that it may contain multiple other values of different types. However, each value that it contains is given a name. Objects are defined inside curly brackets and contain pairs of names and values (called "properties") separated by colons. Each pair is separated with a comma, like this:
{
    some_text: "Hello world!",
    a_number: -12.5,
    my_list: [true, 12 years]
}
Objects may even contain other objects:
{
    some_text: "Hello world!",
    a_number: -12.5,
    an_inner_object: {
        a_boolean: false,
        some_blank_property: blank
    },
    my_list: [true, 12 years]
}
Notice how the property names contain multiple words but use underscores instead of spaces. This is not the only way to name things, but there are some rules around names in LoanScript:
- No spaces are allowed
- Only letters, digits, and underscores are allowed
- Names must not begin with a digit
Among programming languages, there are many different "casing conventions", or ways of naming things consistently. The convention with lowercase words and underscores above is called "snake casing" in programmer lingo. Most LoanScript scripts will have access to pre-defined data that will generally follow this convention, so for consistency, we recommend following it when you name things yourself.
The properties of an object are accessed by putting a dot (
.) after an object value and then putting the name of the property after the dot. This script creates an object namedpersonwith a few pieces of personal information and then outputs the person's name.let person = { name: "Fred", email_address: "fred@example.com", age: 35 } person.name // "Fred"Nothing is done with the user's
email_addressorageproperties. -
Enumeration: Enumerations are groups of options (called "variants"), similar to what you would see in a dropdown list. There is no way to create custom enumerations directly in LoanScript, but the ones created in LoanPASS's enumeration editor are available for use in your scripts. For example, suppose your LoanPASS account has an enumeration called "Occupancy Type" with the options "Primary residence" and "Investment". You want to write a script that outputs the "Primary residence" option. You can access this variant using the name of the enumeration followed by a dot and then the name of the variant, similar to the way you access properties of objects:
OccupancyType.primary_residenceNotice that the name
OccupancyTypedoes not follow the "snake casing" convention described earlier. This type of casing (all the words run together and capitalized) is known as "Pascal casing", and it's generally used to name types, where snake casing is used to name values. An enumeration is a type, not a value. A type describes what kind of data a value can be. The value is the actual concrete data. TheOccupancyTypeenumeration is a type because it defines that "anOccupancyTypemay be either an investment or a primary residence". The value is which of these two options is actually selected. The script above outputs the value, which isprimary_residence.
Operations
LoanScript support some basic operations (addition, subtraction, multiplication, division, and exponentiation) that can be performed on numbers as well as a few other types where applicable. It also supports the use of parentheses and follows the PEMDAS (Parentheses, Exponents, Multiplication, Division, Addition, Subtraction) order of operations.
-
Addition: This operation uses the
+symbol and adds two values together. It can be used on a number of different types.- Numbers:
2 + 3outputs5. - Day durations:
1 week + 2 daysoutputs9 days. - Month durations:
1 year + 2 monthsoutputs14 months. - Dates and day durations:
DATE(6/12/2023) + 1 weekoutputsDATE(6/19/2023). - Dates and month durations:
DATE(6/12/2023) + 2 monthsoutputsDATE(8/12/2023). - Text:
"Hello" + " World!"outputs"Hello World!". Notice that this isn't mathematical addition like the above usages. When you use+on two pieces of text, it joins ("concatentates") them together. - Lists:
[1, 2, 3] + [true, false]outputs[1, 2, 3, true, false]. Like with text, using+on lists concatenates them into a single list.
- Numbers:
-
Subtraction: This operation uses the
-symbol to subtract the second value from the first. It accepts slightly fewer types than addition:- Numbers:
7 - 4outputs3. - Day durations:
1 week - 2 daysoutputs5 days. - Month durations:
1 year - 2 monthsoutputs10 months. - Dates and day durations:
DATE(6/12/2023) - 1 weekoutputsDATE(6/5/2023). - Dates and month durations:
DATE(6/12/2023) - 2 monthsoutputsDATE(4/12/2023).
- Numbers:
-
Multiplication: This operation uses the
*symbol to multiply two values:- Numbers:
3 * 4outputs12. - Day durations and numbers:
1 week * 2outputs2 weeks. - Month durations and numbers:
2 months * 3outputs6 months.
- Numbers:
-
Division: This operation uses the
/symbol and divides the first value by the second:- Numbers:
12 / 4outputs3. - Day durations and numbers:
4 weeks / 2outputs2 weeks. - Month durations and numbers:
6 months / 2outputs3 months.
- Numbers:
-
Exponentiation: This operation uses the
^symbol to raise the first value to the power of the second. It is only usable with numbers.- Numbers:
3 ^ 2outputs9(three squared).
- Numbers:
-
Negation: This operation uses the
-symbol to flip a single value from positive to negative or vice versa. For example, this script outputs-5:let x = 5 let negative_x = -x; negative_x // -5You can of course use it directly to write negative numbers, like this:
let x = -5
x // -5
It also works on day and month durations. This script outputs
DATE(6/5/2023)because it adds "negative one week" toDATE(6/12/2023), which is the same as subtracting a week:let duration = 1 week let negative_duration = -duration DATE(6/12/2023) + negative_duration -
Order of Operations and Parentheses: This script outputs
14because the multiplication is performed first, even though the addition is "first" from left to right:2 + 3 * 4But this one outputs 20 because the parentheses cause the addition to be performed first:
(2 + 3) * 4
Functions
Functions are expressions that you can define once and use multiple times. You can create and use one like this:
let add = (a, b) -> { a + b }

// outputs 5
add(2, 3)
This creates a simple addition function that can take two values, add them together, and output the result. The script above assigns this function to the variable add. The function's inputs, called "arguments", are in the comma-serparated list after the = symbol. You can think of these as variables that only exist inside the function's "body", which is the part between the { and } brackets. These two variables are added together with + and the function outputs the result of that operation.
The variables are given their values when the function is used, or "called", which is what happens on the line add(2, 3). A "call" is written by writing the name of the function (add) and following it with a pair of parentheses that contain a comma-separated list of the values to be assigned to the arguments. So in this example, a is assigned the value of 2 and b is assigned the value of 3, so the function outputs 2 + 3, or 5.
The example function defined above can be used when a and b are given any two types for which addition is valid. For example, all of these calls are valid:
let sum = add(2, 3) // 5
let concatenated_text = add("Hello ", "World") // "Hello World"
let concatenated_list = add([1, 2], [3, 4]) // [1, 2, 3, 4]
let date_plus_duration = add(DATE(6/12/2023), 2 weeks) // DATE(6/26/2023)
If you want to restrict the types of the arguments, you can annotate them with type names. For example, if you want the add function to only add two numbers:
let add = (number a, number b) -> { a + b }

let sum = add(2, 3) // This is valid and outputs 5
let invalid = add("Hello ", "World") // This is invalid and will show an error in the editor
The following type names can be used in this way:
blanknumberbooleantextdateanyday durationmonth duration
LoanScript comes with some built-in functions for your convenience. You can view a list of these under the "Functions" section of the pane to the right of the code editor.
Logicl operations
LoanScript supports some additional operations that are only valid when used with boolean values: and, or, and not.
-
And: The
andkeyword takes two boolean values or expressions and outputstrueonly if both aretrue. If one or both arefalse, the output will befalse.This script outputs
true:let has_good_credit = true let has_enough_income = true let is_approved = has_good_credit and has_enough_income is_approved // trueThis outputs
false:let has_good_credit = true let has_enough_income = false let is_approved = has_good_credit and has_enough_income is_approved // false -
Or: The
orkeyword takes two boolean values or expression and outputstrueif either or both aretrue. It will only outputfalseif both arefalse.This script outputs
true:let is_investment_property = false let is_primary_residence = true let loan_purpose_is_valid = is_investment_property or is_primary_residence loan_purpose_is_valid // trueThis outputs
false:let is_investment_property = false let is_primary_residence = false let loan_purpose_is_valid = is_investment_property or is_primary_residence loan_purpose_is_valid // false -
Not: The
notkeyword flips the value of a single boolean, turningtrueintofalseandfalseintotrue.This script outputs
true:let has_bankruptcy = false let is_approved = not has_bankruptcy is_approved // trueThis script outputs
false:let has_bankruptcy = true let is_approved = not has_bankruptcy is_approved // false
Comparison
LoanScript supports several comparison operations, all of which output a boolean value of true or false. These operations are supported:
-
Equals: Equality comparison uses the "double equals" symbol (
==) to distinguish it from variable assignment, which uses a single equals sign (=). It outputs true if the two values are exactly the same. This script outputstrue:3 == 3 // trueThis outputs
false:3 == 4 // falseThis comparison can be done on values of any two types (they do not have to be the same). It will only output
trueif both values are of the same type and the same value. For example, this will outputfalsebecause one value is a number and the other is text, but it's a perfectly valid expression:5 == "5" // false -
Does not equal: Inequality comparison uses the
<>symbol. It outputs false only if the two values are exactly the same. This script outputstrue:3 <> 4This outputs
false:3 <> 3 // falseLike the
==comparison, this can be used with any combination of types. It will always outputtrueif the types are different. For example, this script outputstruebecause the values are of different types, and are therefore not equal to each other:5 <> "5" // true -
Greater than: Greater-than comparison uses the
>symbol and outputtrueif the first (left) value is larger than the second (right) value. If the values are equal or the first value is smaller, it outputsfalse. It is only usable with certain types.-
Numbers:
4 > 3outputstrue, while3 > 4outputsfalse. -
Day durations:
1 week > 3 daysoutputstrue, while3 days > 1 weekoutputsfalse. -
Month durations:
1 year > 3 monthsoutputstrue, while3 months > 1 yearoutputsfalse. -
Dates: A date is "greater" than another date if it comes later chronologically. So
DATE(6/30/2023) > DATE(6/1/2023)outputstrue, whileDATE(6/1/2023) > DATE(6/30/2023)outputsfalse. -
Text: A piece of text is "greater" than another text if it comes later in alphabetical order. So
"foo" > "bar"outputstrue, while"bar" > "foo"outputsfalse.Note that uppercase letters are considered "first" in alphabetical ordering, so even though
"b" > "a"istrue,"B" > "a"isfalse. If you want to ignore casing when comparing text, you should convert both text values to the same case before comparing using theuppercase()andlowercase()functions. For example, this script outputstrue:let letter_b = "B" let letter_a = "a" // Compares "b" with "a", not "B" with "a" lowercase(letter_b) > lowercase(letter_a) // true
-
-
Greater than or equal: Greater-than-or-equal comparison uses the
>=symbol. This comparison is valid for the same types as>, except that it also outputstrueif the values are equal to each other. -
Less than: Less-than comparison uses the
<symbol and outputtrueif the first (left) value is smaller than the second (right) value. If the values are equal or the first value is larger, it outputsfalse. It is only usable with certain types.-
Numbers:
3 < 4outputstrue, while4 < 3outputsfalse. -
Day durations:
3 days < 1 weekoutputstrue, while1 week < 3 daysoutputsfalse. -
Month durations:
3 months < 1 yearoutputstrue, while1 year < 3 monthsoutputsfalse. -
Dates: A date is "smaller" than another date if it comes first chronologically. So
DATE(6/1/2023) < DATE(6/30/2023)outputstrue, whileDATE(6/30/2023) < DATE(6/1/2023)outputsfalse. -
Text: A piece of text is "smaller" than another text if it comes first in alphabetical order. So
"bar" < "foo"outputstrue, while"foo" < "bar"outputsfalse.Note that uppercase letters are considered "first" in alphabetical ordering, so even though
"a" < "b"istrue,"a" < "B"isfalse. If you want to ignore casing when comparing text, you should convert both text values to the same case before comparing using theuppercase()andlowercase()functions. For example, this script outputstrue:let letter_a = "a" let letter_b = "B" // Compares "a" with "b", not "a" with "B" lowercase(letter_a) < lowercase(letter_b) // true
-
-
Less than or equal: Less-than-or-equal comparison uses the
<=symbol. This comparison is valid for the same types as<, except that it also outputstrueif the values are equal to each other.
Conditions
A common use case in LoanScript is to output different values based on whether some condition is met. This is done with an if {condition} then {value when true} else {value when false} expression. This expression evaluates the code in {condition} (which is just a placeholder for the actual code, which you'll see shortly), which must always output a boolean (true/false) value. If the condition is true, then the script outputs the value of {value when true}, otherwise it outputs {value when false}. For example, this script will always return the text "It's true!":
if true then "It's true!" else "It's not true."
While this one will always output `"It's not true.":
if false then "It's true!" else "It's not true."
Obviously this isn't very useful, since the condition never changes. For a slightly more realistic example, let's say you're writing a script that grades an applicant's credit score and outputs a message telling them about it.
Note: If you've been following along by trying out code in the editor, don't enter the code in the rest of this section just yet. It won't actually work, for a reason we'll get to in the next section.
if Loanpass.credit_application_fields.decision_credit_score > 680 then "You have great credit!" else "You have bad credit."
This will output "You have great credit!" as long as the score is higher than 680, and "You have bad credit" otherwise.
But what if we want to categorize the credit score into more than two "buckets"? That's easy with a little additional code, but before we move on, lets clean up this code a bit. That's a pretty long line and it might require horizontal scrolling in the editor, depending on your screen size.
For more credit score buckets, we're going to need more comparisons on Loanpass.credit_application_fields.decision_credit_score property, but that a lot to type out for every one of them. So let's assign that to a variable called score and just compare against that.
let score = Loanpass.credit_application_fields.decision_credit_score

if score >= 740 then "You have great credit!" else "You have bad credit."
That's already a bit easier to read. But let's break up this line so it's easier to visually parse where the condition and the values are.
let score = Loanpass.credit_application_fields.decision_credit_score

if score >= 740 then
   "You have great credit!"
else
   "You have bad credit."
Now it's easy to see all the parts of the if-expression at a glance. It's generally great practice to put the values on their own lines and indent them like this.
Now for the additional buckets. Let's say we want to add a "good" bucket between "bad" and "great". Values in the if-expression don't have to be simple—we can put more complex expressions there to output even more values. So let's add another if-expression inside the else clause.
let score = Loanpass.credit_application_fields.decision_credit_score

if score >= 740 then
   "You have great credit!"
else
   if score >= 670 then
      "You have good credit."
   else
      "You have bad credit."
In this script, if the score is below 720, then we enter the first else clause, where we evaluate whether the score is 670 or above. If it is, then we say the applicant has "good" credit.
Let's add another condition, giving us four categories: "great", "good", "fair", and "bad".
let score = Loanpass.credit_application_fields.decision_credit_score

if score >= 740 then
   "You have great credit!"
else
   if score >= 670 then
      "You have good credit."
   else
      if score >= 580 then
         "You have fair credit."
      else
         "You have bad credit."
The indentation rule that was supposed to make our code more readable is starting to feel counterproductive. Let's collapse the spacing between all those elses and ifs.
let score = Loanpass.credit_application_fields.decision_credit_score

if score >= 740 then
   "You have great credit!"
else if score >= 670 then
   "You have good credit."
else if score >= 580 then
   "You have fair credit."
else
   "You have bad credit."
Now we can easily read each credit tier from the top down.
Notice how our experiments with spacing didn't affect the meaning of the code—it's valid either way. This is because "whitespace" (spaces, tabs, and newlines) do not have any meaning in LoanScript other than being necessary to separate keywords and names. We could run this entire script together on one line or put every word on a different line and it would still be valid. But following spacing conventions like the ones demonstrated above is a good practice to make sure your code remains easy to read and write as it becomes more complex.
Multiple types and type guards
The above script will not actually work in a real LoanPASS tenant account without a minor tweak. This is because fields on the credit application form can be left blank, so Loanpass.credit_application_fields.decision_credit_score, and thus the score variable, is not necessarily a number. It may be a number, but it may also be blank. This is a problem because if it's blank, then the conditions in the if-expression are nonsensical. Is blank >= 740 true or false? Keep in mind that blank is not zero, it's just blank, i.e., it has no value at all.
We need some way to only evaluate the if-expression if score is a number, and output some other message ("We don't know what your credit score is!") if it's blank. We can use another if-statement and a special expression known as a "type guard" to do this. These are written as <some variable> is <some type> or <some variable> is not <some type>. This outputs a boolean value, so we can use it as the condition in an if-expression. We can construct a new if-expression and "wrap it around" the one from the previous section so that it only gets evaluated if score is a number:
let score = Loanpass.credit_application_fields.decision_credit_score

if score is number then
   if score >= 740 then
      "You have great credit!"
   else if score >= 670 then
      "You have good credit."
   else if score >= 580 then
      "You have fair credit."
   else
      "You have bad credit."
else
   "We don't know what your credit score is!"
The above script only executes the original if-expression if the condition score is number is true. If it's not a number then it must be blank, so we output a message saying so ("We don't know what your credit score is!").
The is keyword is a special type of comparison that outputs a true/false value like the others, but the right-hand side of it must be a type, not a value. We could also write this condition as score is not blank. Since the only other possibility is number, that would also make the comparisons valid.
The following type names can be used in this way:
blanknumberbooleantextdateanyday durationmonth duration
List operations
LoanScript supports several operations that are unique to lists and allow you to do things like add a list of numbers, sort a list of text alphabetically, and filter out unwanted values.
-
Replace: The
replaceoperation runs a function on every item in a list and outputs a new list that contains the outputs of the function. Its syntax looks like this:<list> replace with <function>For example, this expression takes a list of numbers and outputs a list with all the numbers doubled:
// outputs [2, 4, 6]
[1, 2, 3] replace with (item) -> { item * 2 }
The function can optionally take a second argument, which is the index of the item in the list. Remember that indices start at zero. This expression takes every number in a list and multiples it by the index of that number in the list:
// outputs [0, 2, 6] (by multiplying [1 * 0, 2 * 1, 3 * 2]) [1, 2, 3] replace with (item, index) -> { item * index } -
Filter: The
filteroperation runs a function on every item in a list. That function must return a booleantrue/falsevalues that says whether or not the item should be included in the output. Its syntax looks like this:<list> filter with <function>For example, this expression takes a list and removes all the values less than
3:// Outputs [3, 4, 5] [1, 2, 3, 4, 5] filter with (item) -> { item >= 3 }filteralso takes an optional index argument. This expression outputs all but the first two names in a list:// outputs ["Steve", "Joan"] ["Bob", "Alice", "Steve", "Joan"] filter with (item, index) -> { index >= 2 } -
Sort: The
sortoperation runs a sorting function on pairs of list items and outputs a list with the same values as the original list, but in sorted order. Its syntax looks like this:<list> sort with <function>The function should output a boolean that says whether the first and second argument are in the correct order. For example, the code below sorts a list of numbers from smallest to largest. If
a < b, then the items are in the correct order (smaller then larger) and the function returnstrue.// Outputs [-3, 2, 4, 6] [4, 2, 6, -3] sort with (a, b) -> { a < b }The function is called repeatedly during sorting, with the arguments
aandbbeing assigned pairs of list items in the order that they currently appear in the list. For example, the function will be called first witha == 4andb == 2, so the comparison will be4 < 2, which isfalse. This tells the sorting operation that these items are in the wrong order and need to be swapped, so the list becomes[2, 4, 6, -3]. Then the next pair, which is now4and6, is checked. The function body will returntruethis time, so these will not be swapped. This process continues until no more swaps are needed. At this point the list is sorted. -
Combine: The
combineoperation is used to aggregate all the items in a list into a single value. Its syntax looks like this:<list> combine from <initial_value> with <function>Notice the
from <initial_value>, which is a bit different from the previously described operations. This is a starting value on which to build the final output. For a simple example, this expression sums a list of numbers:// Outputs 12 (0 + 2 + 4 + 6) [2, 4, 6] combine from 0 with (total, item) -> { total + item }The first argument, which we've chosen to call
totalhere, receives the output of the function from the last time it was evaluated. Since there is no "last time" the first time the function is called, it receives the initial value of0for that call (specified by us withfrom 0). So for the first call, the arguments are0and2, which are added to produce2. On the next iteration,totalwill be2anditemwill be4, which add up to6. Finally, the arguments are6and6, which add up to12. Since there are no more list items,12becomes the output. You could of course start with a different value, for example10:// Outputs 22 (10 + 2 + 4 + 6) [2, 4, 6] combine from 10 with (total, item) -> { total + item }Like some of the other list operations, this operation takes an optional argument for the index of the item in the list. This expression sums all the items in a list except for the first two:
// Outputs 14 (6 + 8)
[2, 4, 6, 8] combine from 0 with (total, item, index) -> {
    if index >= 2 then
       total + item
    else
       0
}
Until the third item, the expression adds
0to the total, effectively skipping the first two.
Any list operation that outputs a list (which most of them do) can be directly followed by another list operation, allowing us to "chain" list operations. This can often be used to break up operations so that the intent of an expression is more obvious from reading its code. For example, let's take a second look at the sample code from above where we add up all but the first two numbers in a list:
[2, 4, 6, 8] combine from 0 with (total, item, index) -> {
    if index >= 2 then
       total + item
    else
       0
}
It would be easier to understand the intent of this expression if we explicitly filtered out the unwanted items before summing them. We can in fact do this by chaining multiple list operations:
// outputs 14
[2, 4, 6, 8]
   filter with (item, index) -> { index >= 2 } // Removes the first two items (2 and 4)
   combine from 0 with (total, item) -> { total + item } // Adds the remaining items (6 and 8)
This expression drops the first two values using filter with, then sums the rest, which gives the same result (14). This way of writing it neatly separates the operations into two distinct phases.
Okta (OpenID Connect) SSO setup
LoanPASS supports using Okta and other OpenID Connect providers to allow for single sign-on (SSO) for your organization. You can either allow for users to continue to sign in via email / password alongside SSO, or you can enforce that all users must sign in via SSO.
Note: To sign in via Okta, a user account must first be added in LoanPASS by a LoanPASS admin. The email address must match between the user's Okta account and their LoanPASS account.
Configuring SSO via Okta
To allow users to sign in via Okta, you will need to create an Okta app for LoanPASS, and additionally configure your LoanPASS client to use Okta for SSO.
Create an Okta app
Navigate to the Okta Admin Console. From the Okta user dashboard, Okta administrators should have an "Admin" button on the top right of the page.
Under the sidebar, navigate to "Applications > Applications", then click "Create App Integration"
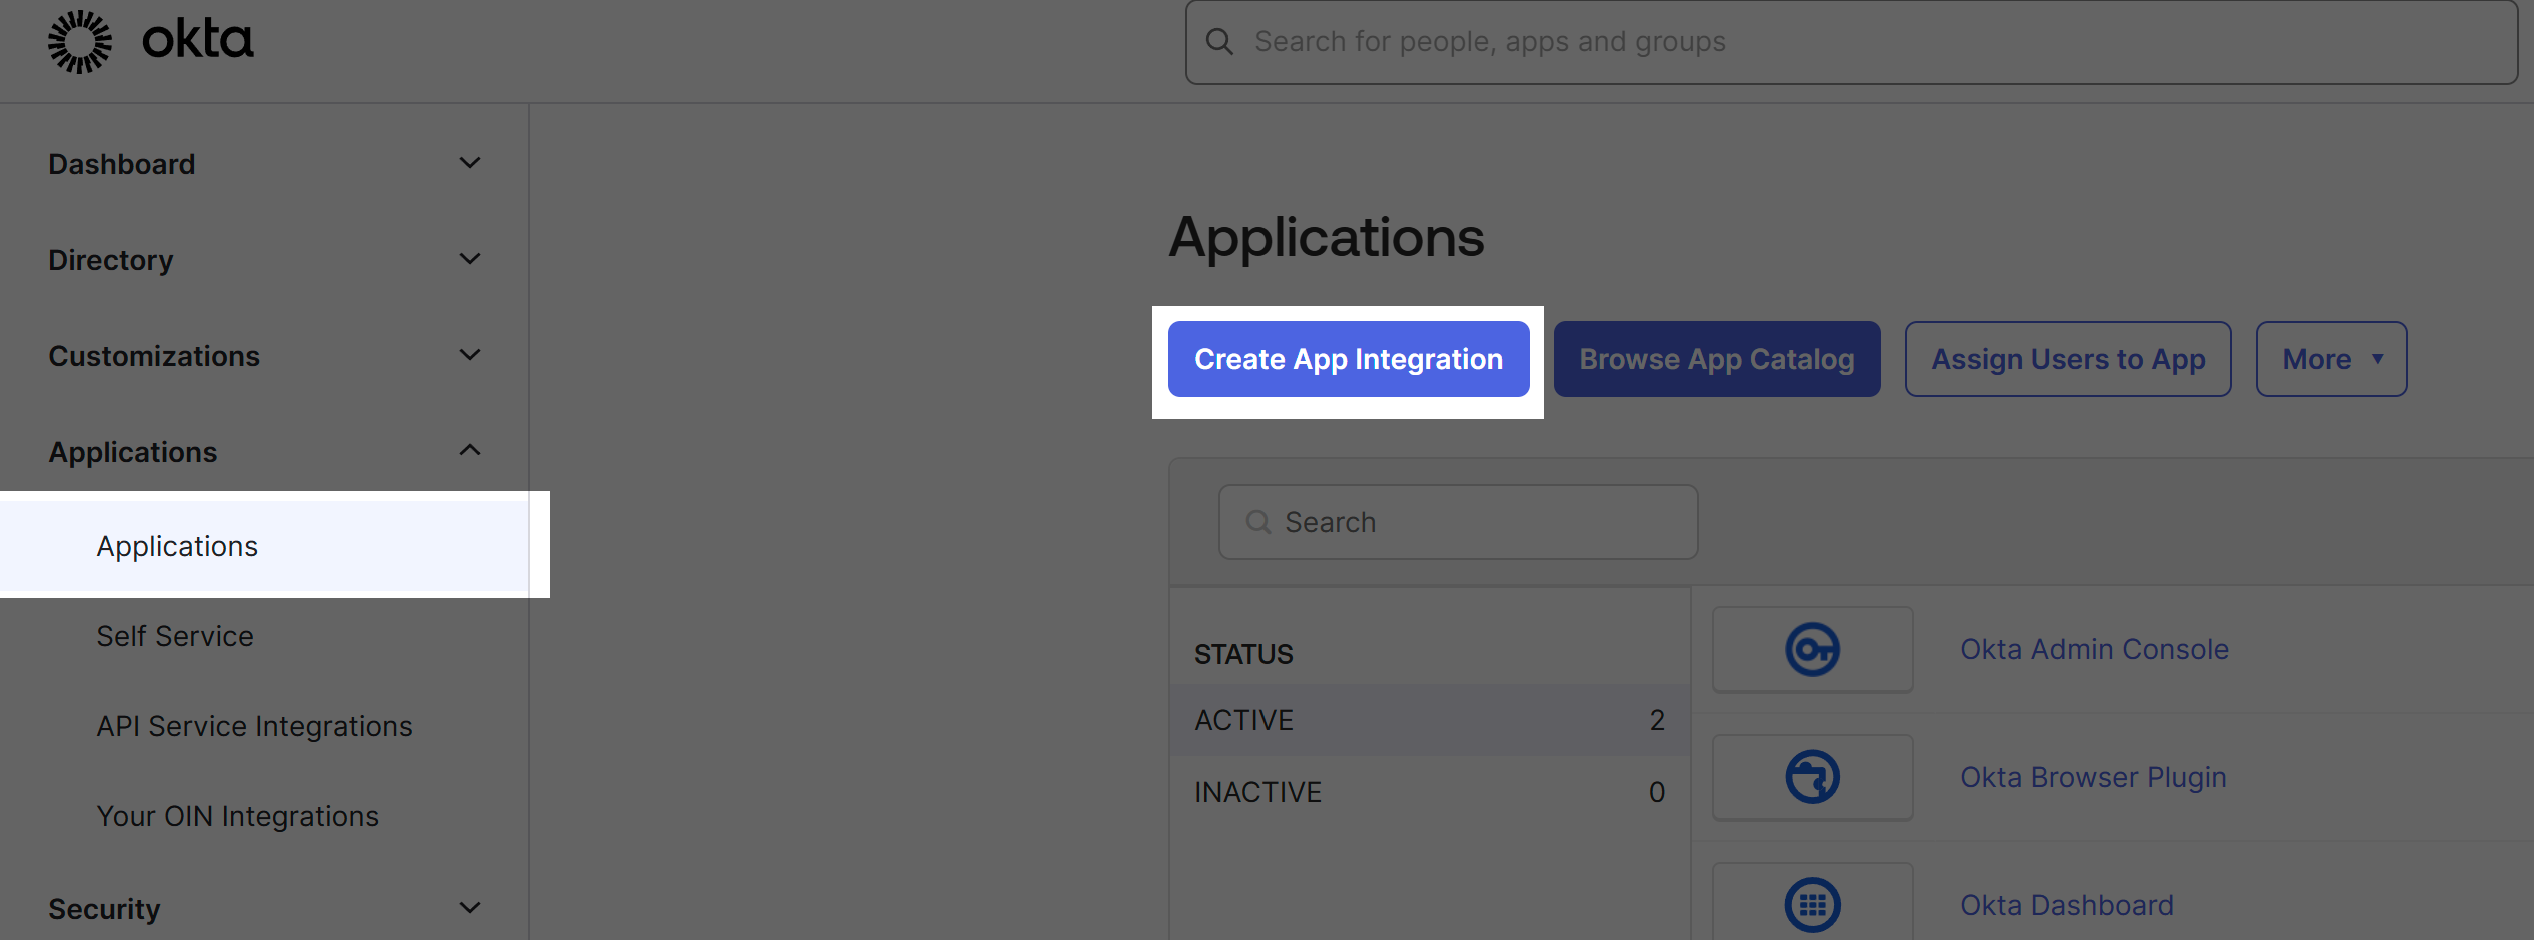
For the sign-in method, choose "OIDC - OpenID Connect". Then, for application type, choose "Web Application". Then click "Next".
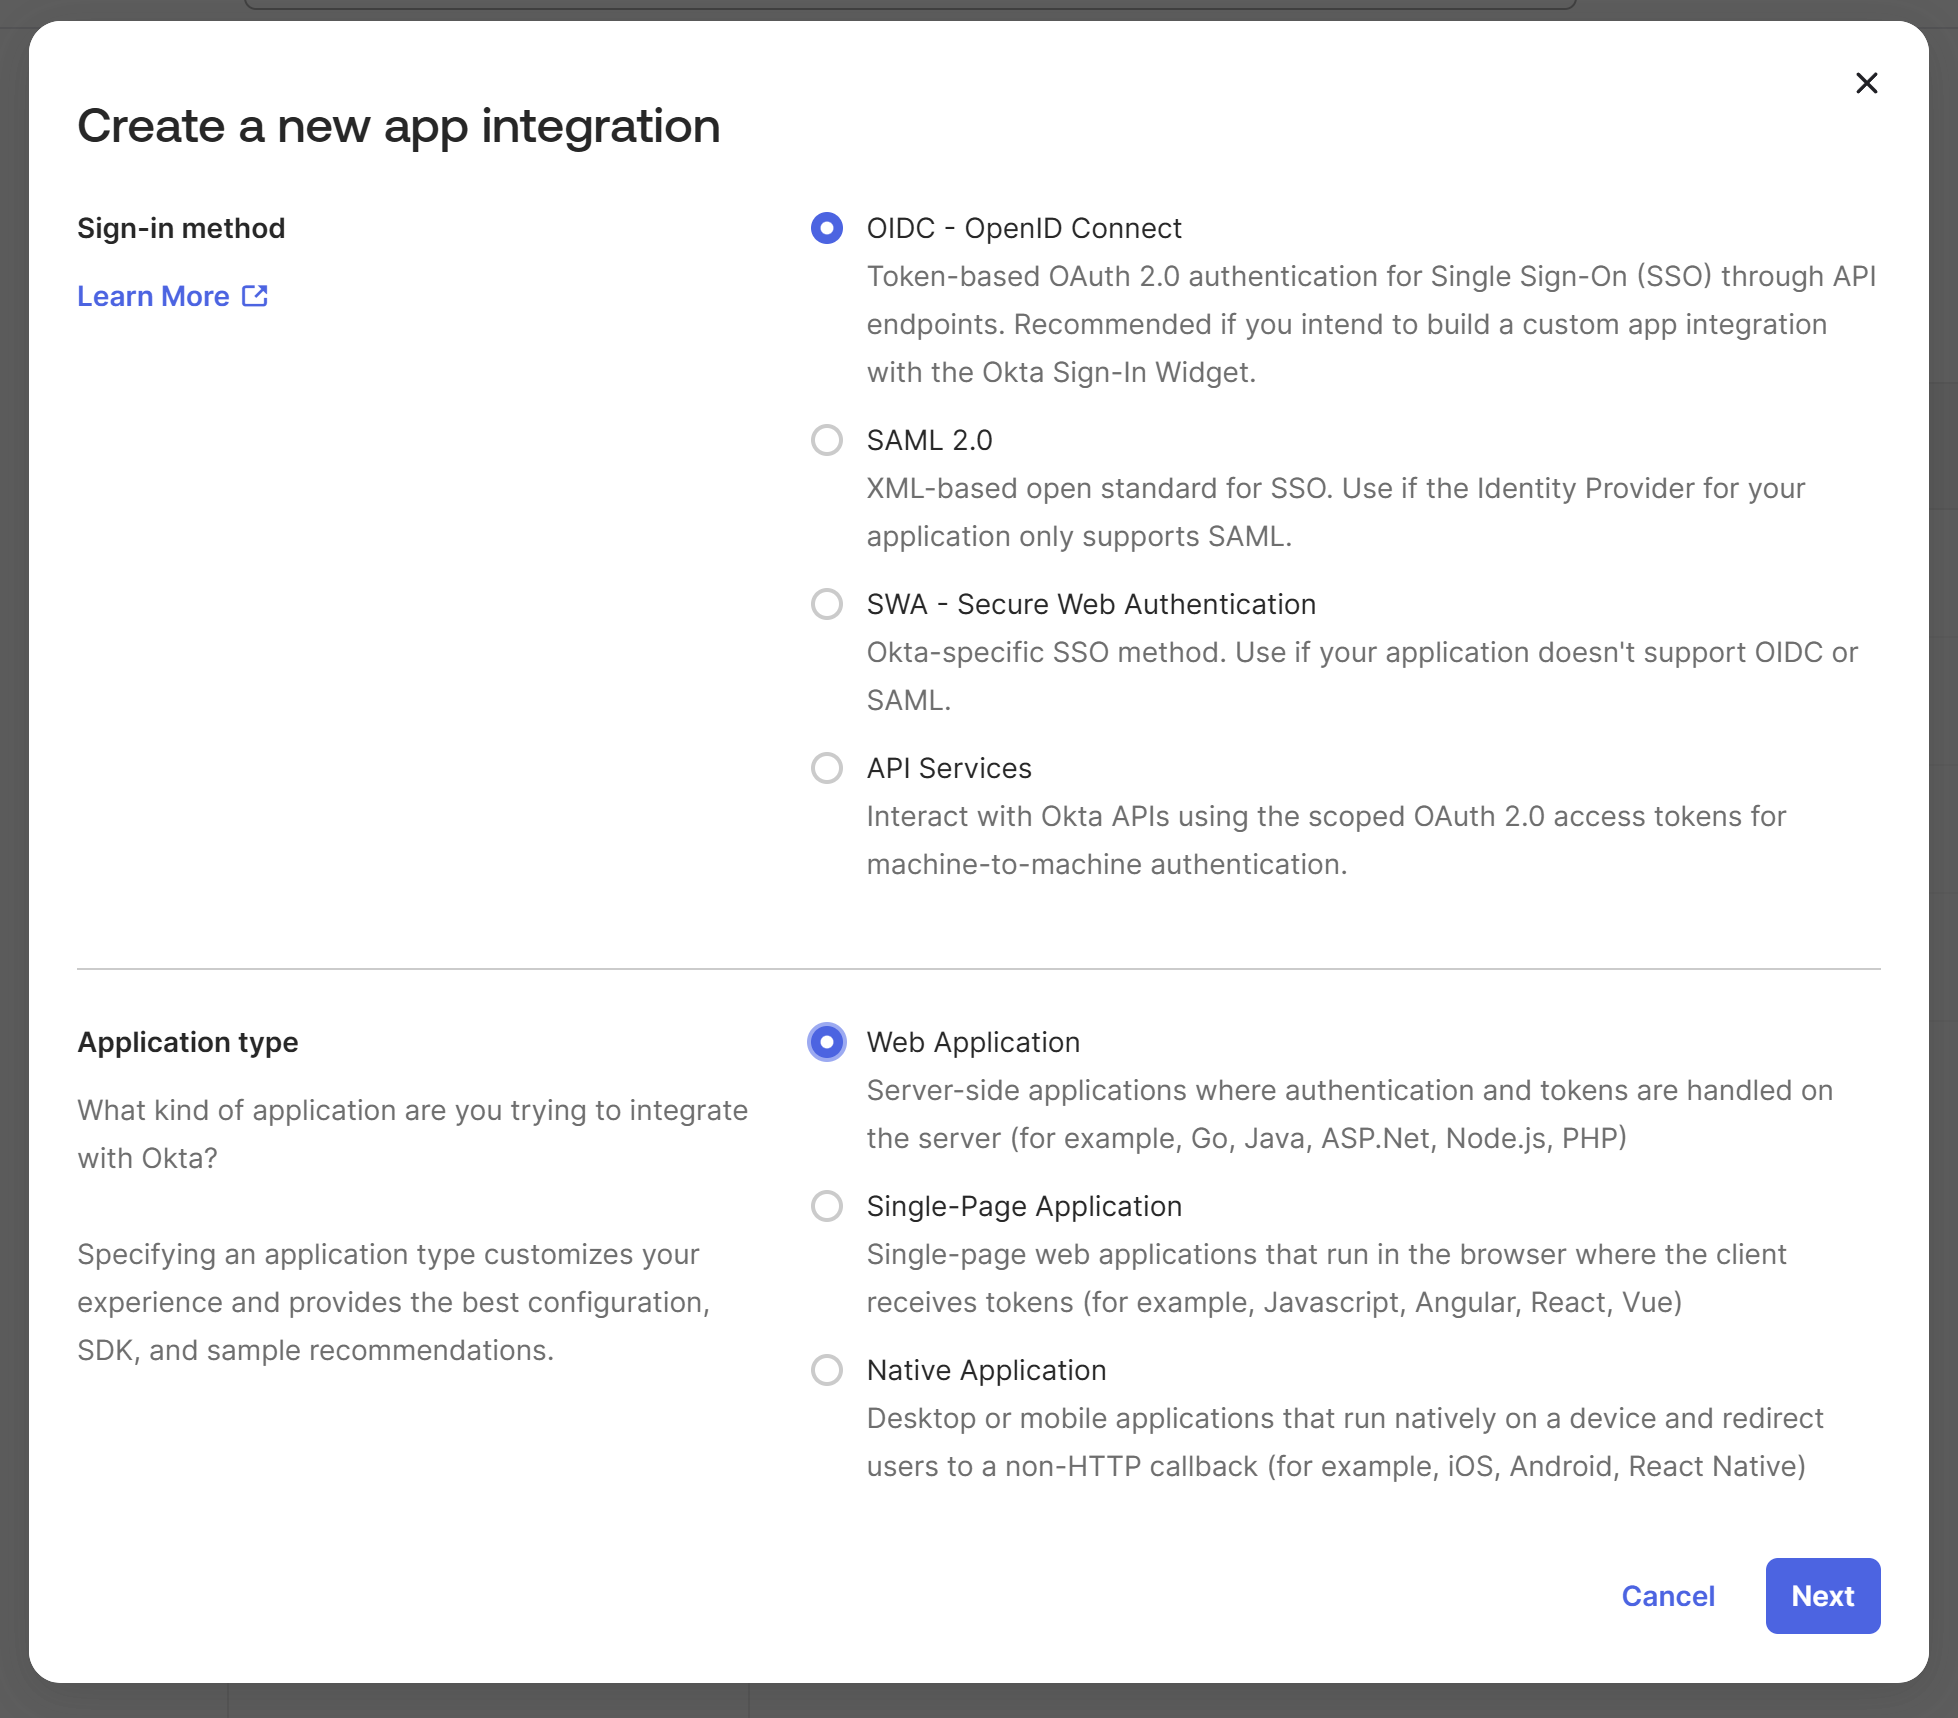
On the "New Web App Integration" screen, make the following changes:
- General Settings
- App integration name: LoanPASS
- Grant type: Enable Refresh Token
- Sign-in redirect URIs
- Replace the default with the following URL:
https://app.loanpass.io/api/sso/oidc-callback
- Replace the default with the following URL:
- Sign-out redirect URIs
- Replace the default with the following URL:
https://app.loanpass.io
- Replace the default with the following URL:
- Assignments
- Choose which users should be able to sign in to LoanPASS via Okta. For example, choose "Allow everyone in your organization to access" if all users should be able to sign in to LoanPASS through Okta.
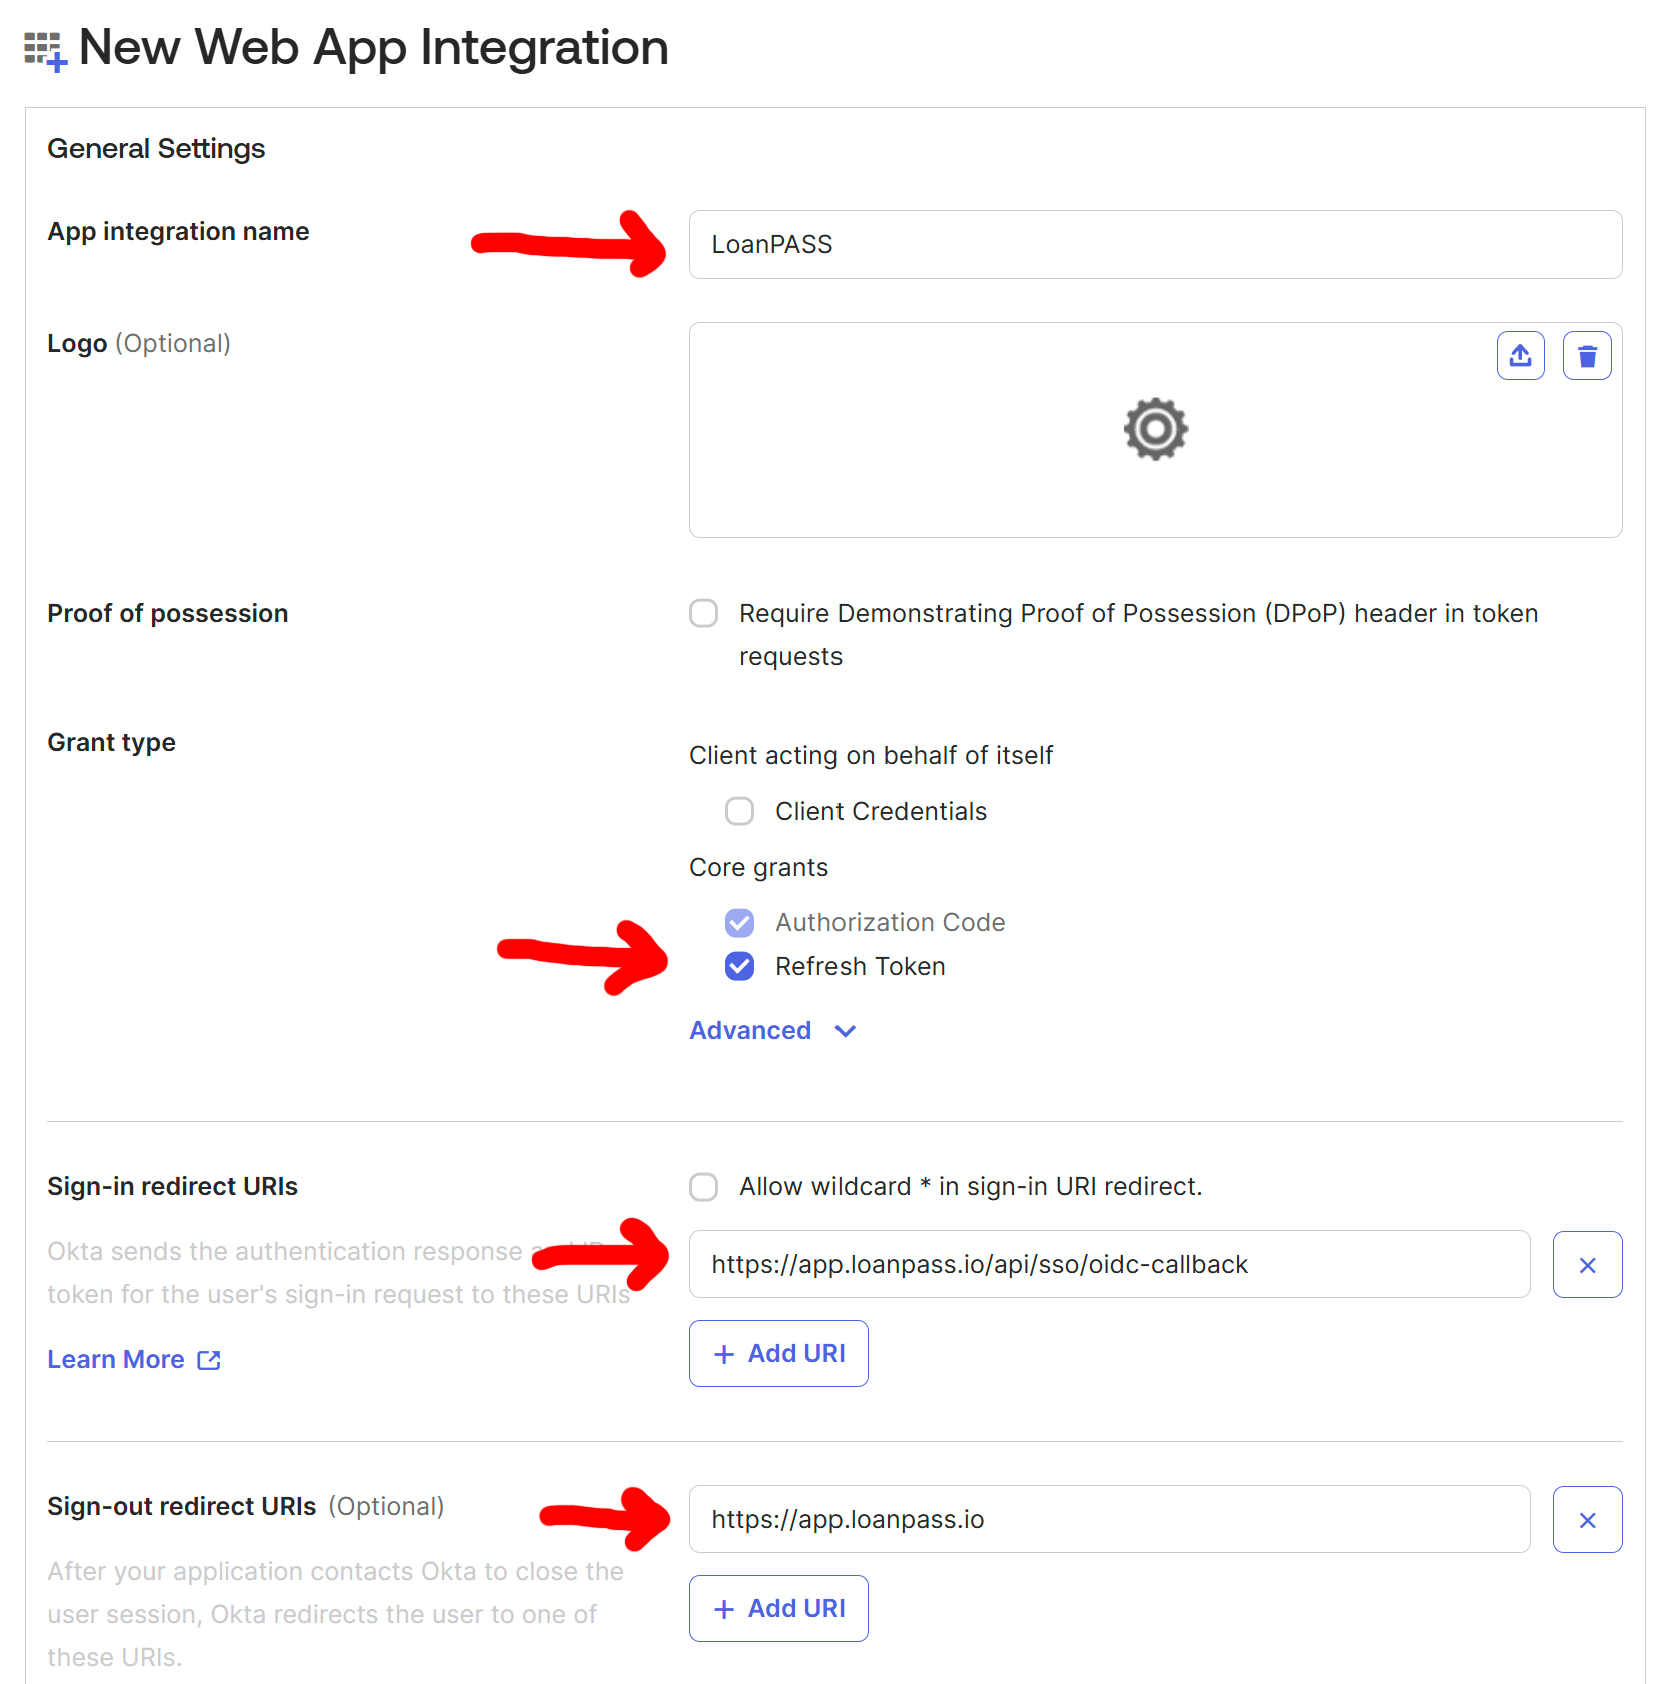
Click "Save" to create the app integration. You should be taken to the configuration for the new app.
Configure the Okta app
On the configuration screen for the new application, click "Edit" within the "Client Credentials" section. Enable the option "Require PKCE as additional verification", then click "Save"
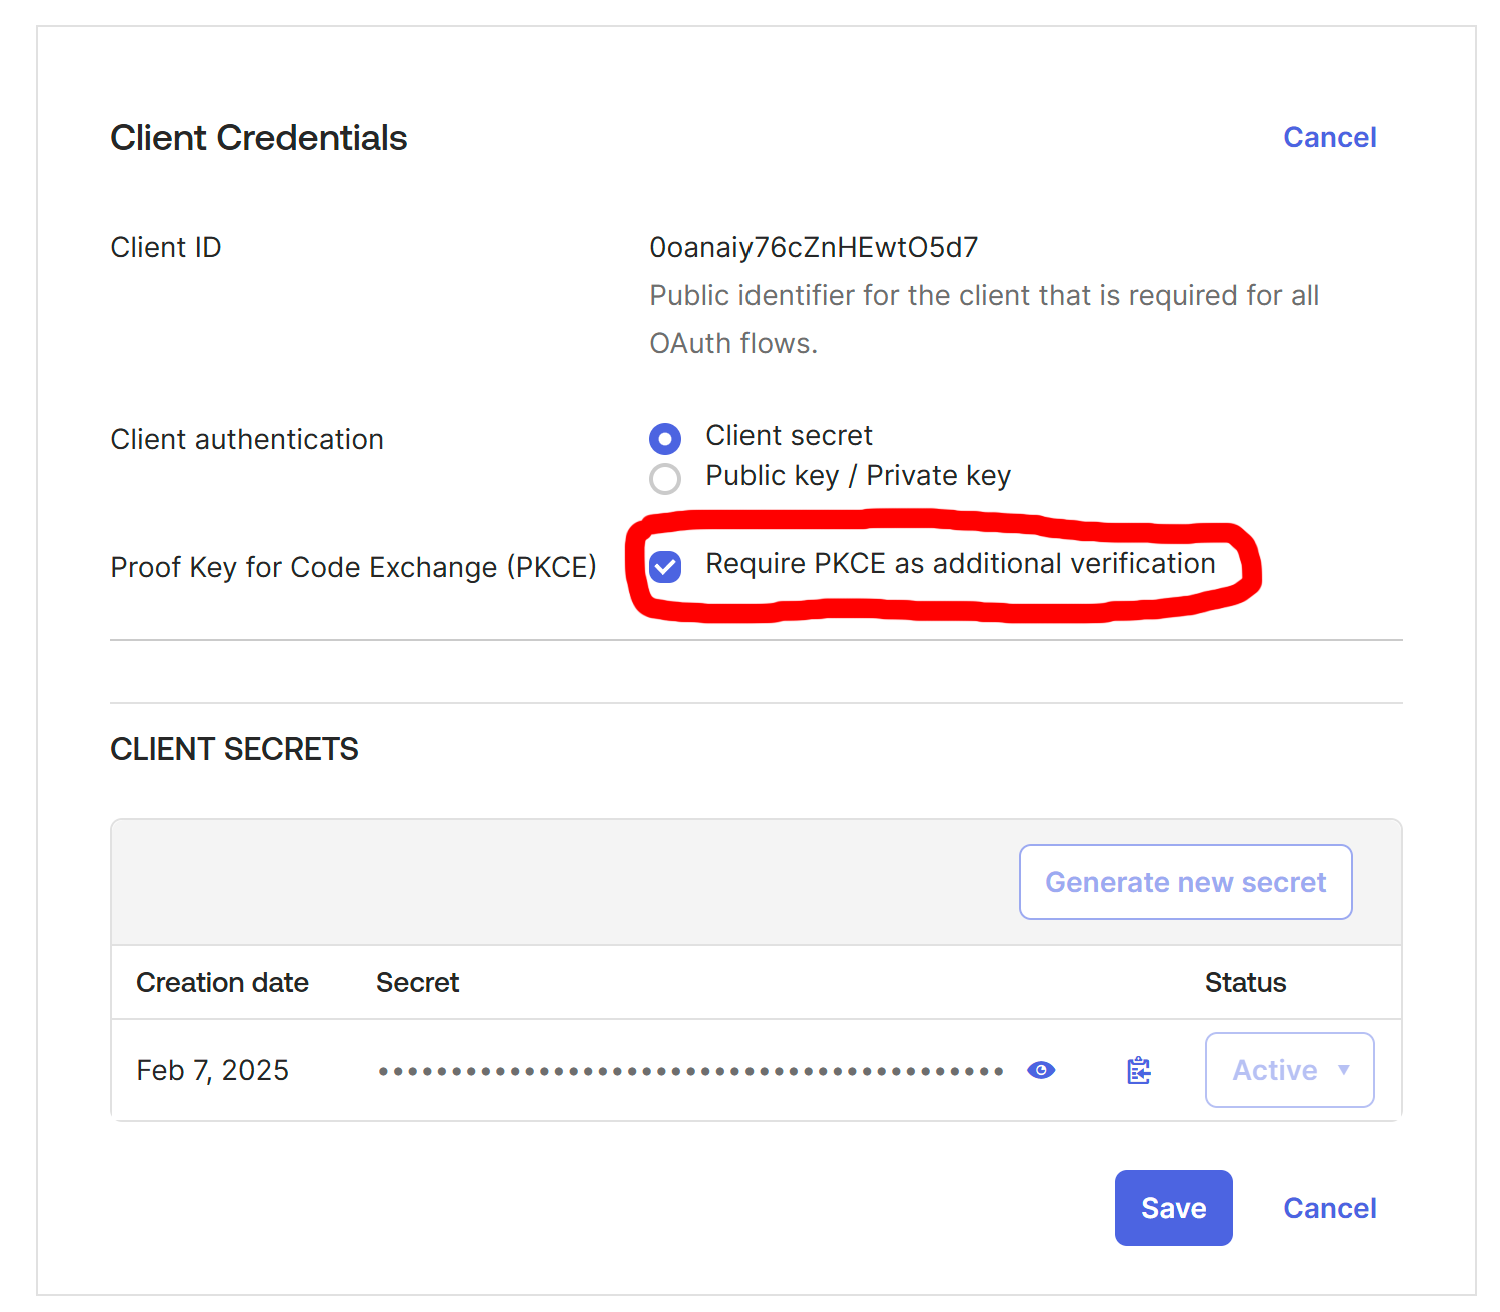
On the same screen, click "Edit" under "General Settings". For "Refresh Token > Refresh token behavior", choose "Rotate token after every use", then click "Save".
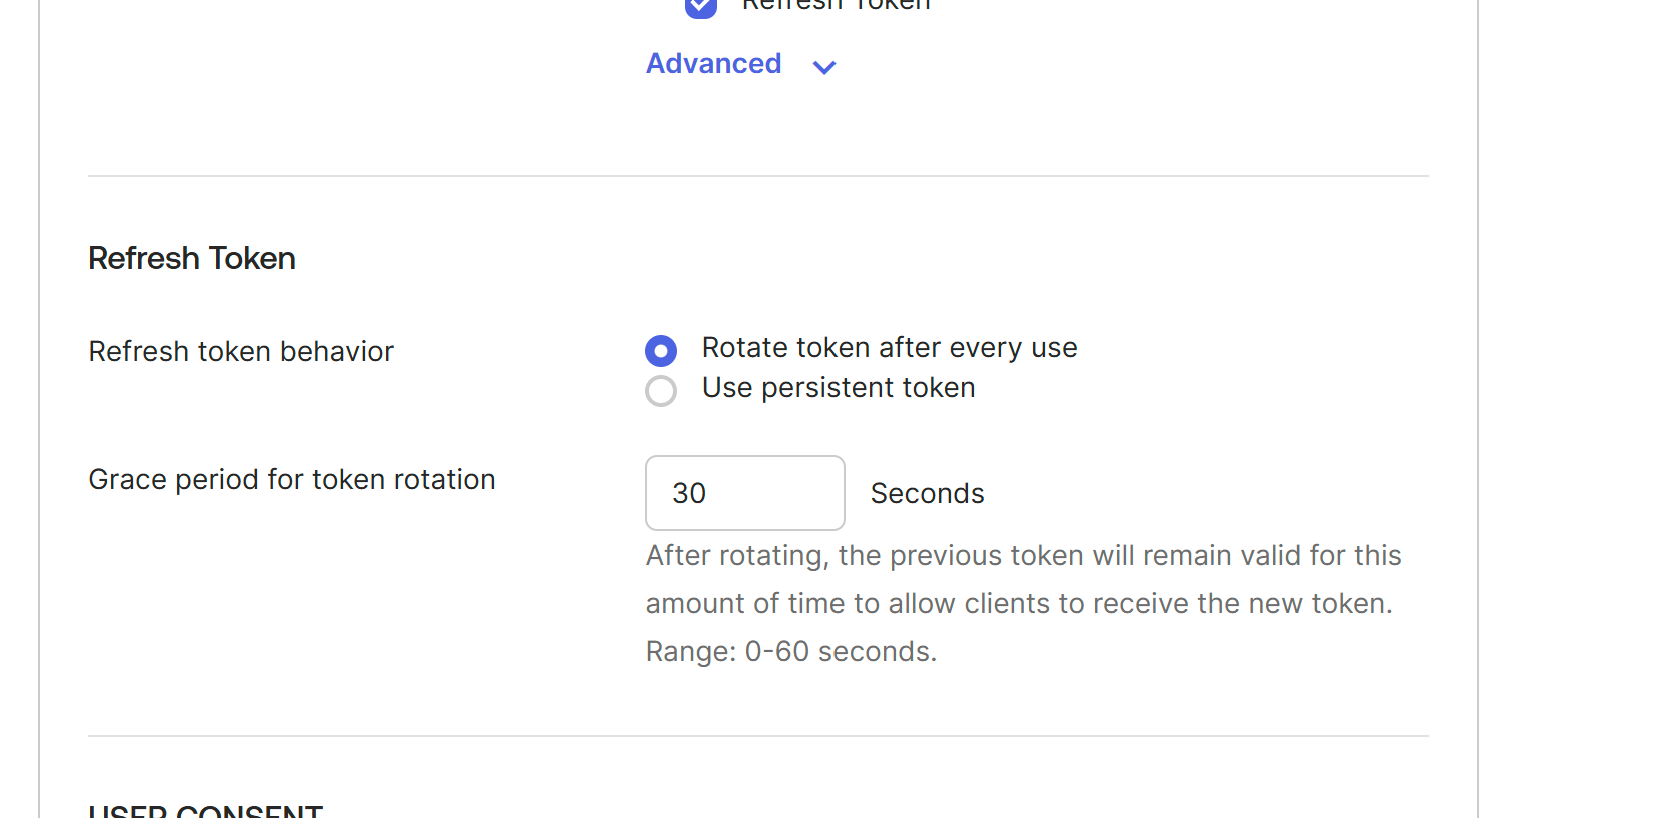
Configure OpenID Connect in LoanPASS
Grab the client ID and copy the client secret, and submit a support request with the following details:
- Your Okta domain name:
https://myorg.okta.com - The app's Client ID
- The app's Client secret
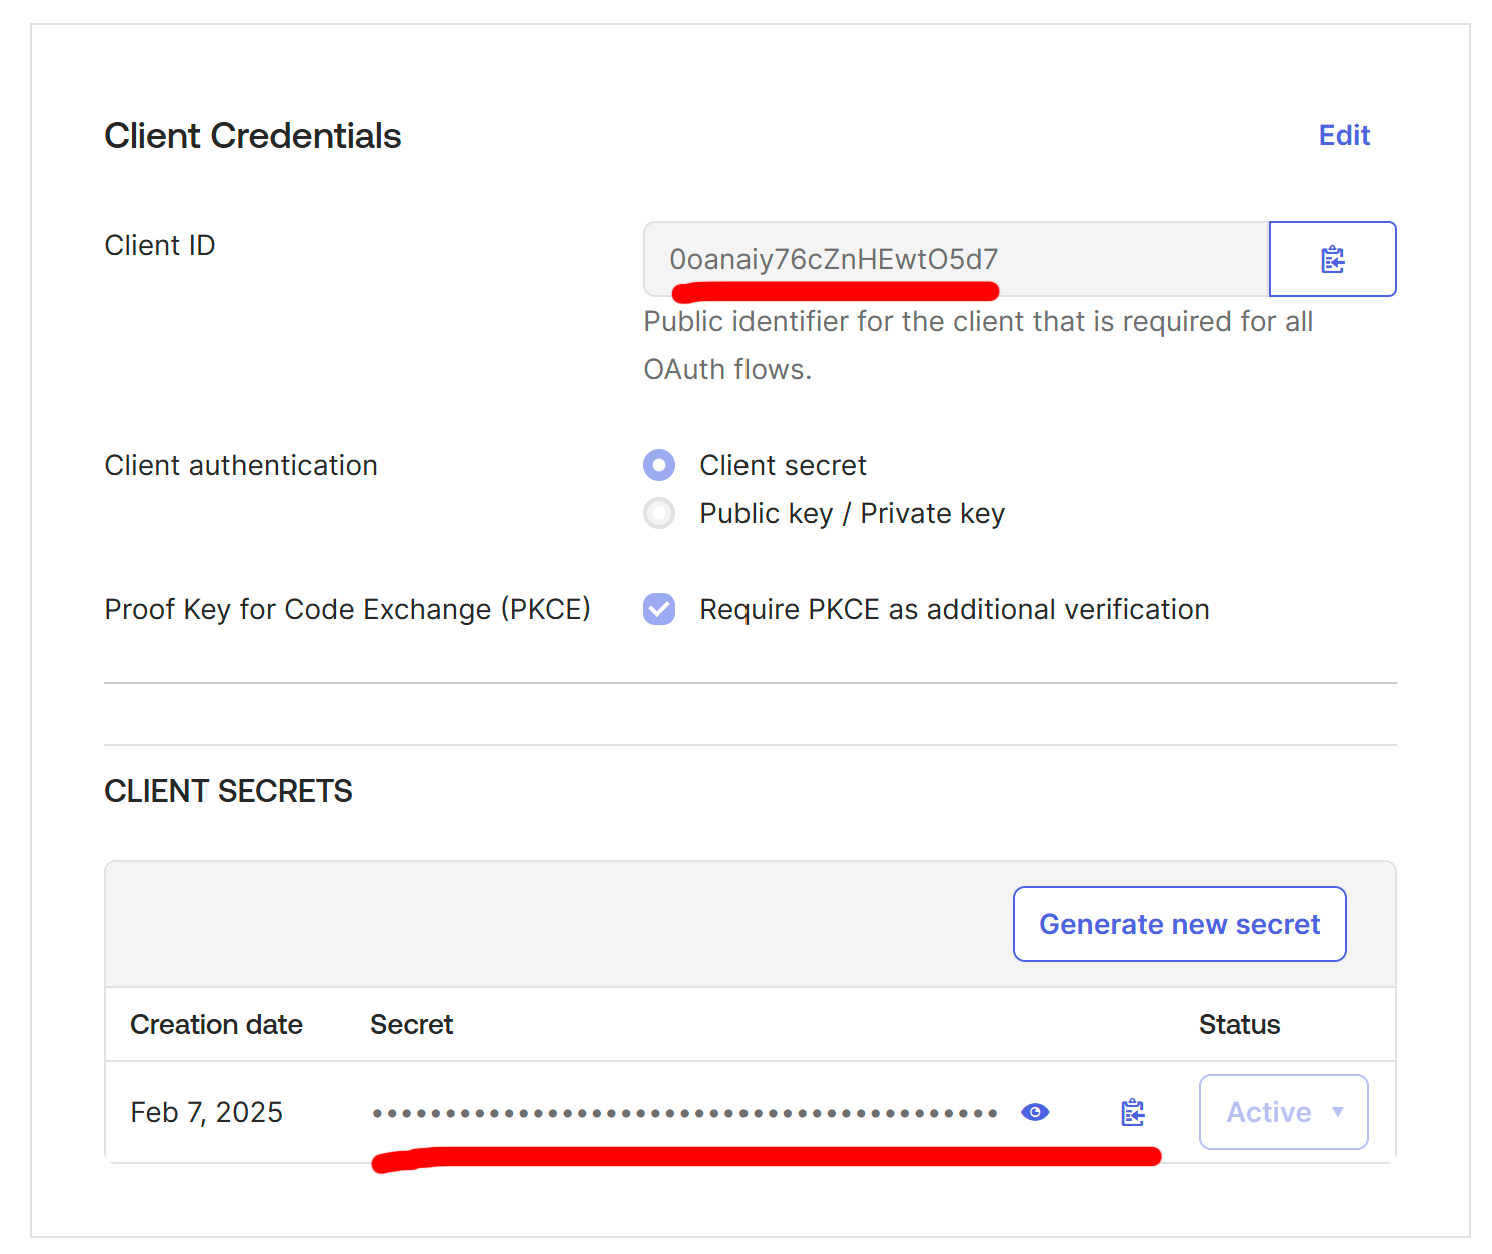
Configuring SSO via another OpenID Connect provider
LoanPASS SSO supports providers that follow the OpenID Connect protocol. To configure LoanPASS for SSO, you will need to configure an integration and grab the following details:
- Issuer URL
- Client ID
- Client secret